Pages

Tuesday, July 29, 2014

Dragonfly card and draw winner!

 
Tuesday...finally!  Sometimes Mondays can be so Monday-ish.  :)
Butterflies/Dragonflies set of 7 stamps
Popping in today to share a dragonfly card using Sizzix' Layered Dragonfly and Quietfire's Dragonfly stamp (from the set above).  The dragonfly took several steps to make but it was worth it.  I decided to list the steps instead of doing a paragraph:

  1. Run white paper through die. Emboss.
  2. Cut off wings (sorry Mr. Dragonfly!)
  3. Stain body using Peacock Feathers and Black soot.
  4. Apply Stickles at will.
  5. Run vellum paper through die. Emboss.
  6. Cut off wings (sorry again!). 
  7. Color back of wings using distress marker in Scattered Straw.
  8. Use distress marker in Black Soot on top of vellum wings along the veins.
  9. Apply Stickles at will.
  10. Adhere dry wings to body.  
The card base was made using distress cardstock (from my scrap stash) die cut using Spellbinders Grand Scalloped Rectangles.  The frame was cut using Grand Rectangles.  
Quietfire's Dragonfly was stamped onto die cut paper (Spellbinders' Squares).  That fun wavy line of gems is from my hoarded clear and yellow Recollections gem pack that I have had for well over a year.  Personal questions: Why do I hold onto things after buying them?  Why am I always so weary of cutting pretty paper and special bling stickers and special ribbon?  Please tell me you do the same!
That's my card!  Hope you liked it!  Now onto the draw...

The winner of the draw is Heather Thompson!!  Woo-whooooo!  Congrats, Heather!  Could you please drop me an email with your contact info?  It is little_teapot at live dot com.  

Thanks so much to everyone that left a comment!  There will be a few more draws so you will have more opportunities to win!

Thanks for stopping by and have a wonderful week!
Hugs,

Monday, July 28, 2014

Monarch Butterfly wall hanging

Hello All!

Today I am sharing a wall hanging that I made for my craft room.  I wanted something bright, bold and colorful to hang on the white storage unit in the room.  The wall hanging pops against the white!

The wall hanging is entered into the Craft Hoarders Anonymous challenge this fortnight: embossing.  My hoarded item for this project is my sweet Olde Curiosity Shoppe paper from Graphic 45.  Ugh...I wish I had two pads of this paper!
The butterfly was embossed and die cut using Sizzix's new butterfly set Layered Butterfly (659578).  Tim Holtz stain in Spiced Marmalade, Scattered Straw and Black Soot was applied.  It was spritzed using gold glitter spray.
A wood frame (from Michaels) was colored using Tim Holtz stain (Tarnished Brass), dried, and then white crackle applied.  The cracks are difficult to see in the photos but are shiny brass.
The base was die cut using two of the circles from Spellbinders Grand set: Stately Circles.

Thanks so much for stopping by to see my wall hanging.  I hope you like it!
Hugs,
Kathy Jo

This project is entered into the following challenges:
Craft Hoarders Anonymous, Embossing
613 Avenue Create, AG
Simon Says Stamp Wednesday, Embossing
Pile It On, Embossing
Sisterhood of Crafters, Die Cuts or Punches
Scrapping for Fun, AG

Sunday, July 27, 2014

Believe in Yourself, Kraft and Butterfly card

Happy Sunday!

How is your weekend going?  Mine has been great so far.  Yesterday morning I went to Carsand Mosher (an awesome local crafty store) with two of my besties, Janice and Rebecca.  Then, it was a dog park trip with our Saint Bernard, Ella.  Afterwards my hubby started up the smoker (yay!) and our friend came over for dinner.  The guys hung out and I played in the craft room until 3am!  I woke up at 7 and continued with crafting.  I made three cards and a wall hanging!  A very product and fun weekend.  :)
One of the cards I made was for the Kraft Journal challenge this week.  The card was made using kraft card stock and the patterned paper is from Prima's Fairy Belle mini pad.  
I cut a small piece of kraft paper and dry embossed it using Cuttlebug folder "Poppy".  Picket Fence stain was applied.  Quietfire's "Believe in Yourself" is the beautiful sentiment.
Martha Stewart's butterfly punch was used on scrap paper.  Ivory paper was die cut using the corner die from Spellbinders' Floral Doily Motifs.
Thanks so much for stopping by!  Enjoy the rest of your Sunday and week!
Hugs,
Kathy Jo

This card is entered into the following challenges:
Kraft Journal, Sketch
613 Avenue Create, AG
Word Art Wednesday, AG
Crafty Hazelnuts, Patterned Paper

Friday, July 25, 2014

Sassy Shaped card

shaped, card, sassy, floral flourishes
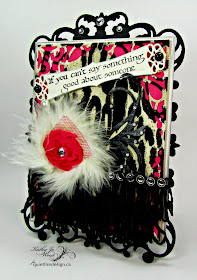
Happy Friday!  Today is my day to post at Quietfire and I made a sassy, frilly, girly, fun card. It uses Quietfire's Sit by Me stamp which is also fun and full of sass.  :)

Here is a closeup of the card front:  
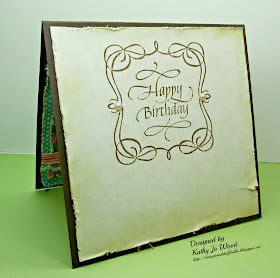
And a sneak peek of the card inside.
The stamp used is part of the Garden Bench Collection stamp set which contains all of these beautiful stamps:
Garden Bench Collection - Set of 4 Stamps

For more details feel free visit the Quietfire post! Thanks so much for stopping by and have a wonderful weekend!
Hugs,
Kathy Jo  

This card is entered into the following challenges:

Tuesday, July 22, 2014

Christmas Card...'tis the Season :)

 
Hello Crafteteers!

Ah...July...such a gorgeous time of year: the sun is shining, flowers blooming, kids playing, mowers mowing and crafters making Christmas cards.  :)

Many blog sites are keeping us crafters in check and ensuring that we get a head start on our Christmas cards.  JustRite is one of those blogs and their challenge this time is Non-traditional Christmas colors.  I decided to make a card using white, purple (dusty concord) and kraft.  Purple is a color hardly used in any of my projects so this was an enjoyable change.  
The card front used "Merry and Bright" from JustRite's Christmas Inner Thoughts and the poinsettias (Hey!  I spelled that correctly without autocorrect!) are from JustRite's Festive Poinsettia.  I filled in the open areas of the poinsettias with my dusty concord Distress Marker.  Bling berries were applied.
The card base was made using Spellbinders Grand Decorative Labels One and also Scalloped Labels One.  I applied dusty concord along all of the edges and a wee bit of walnut stain, too.  Glitter mist was also sprayed on the card front.

Thanks so much for stopping by!  Hope you all are having a fantastic week.
Hugs,
Kathy Jo

This card is entered into the following challenges:
JustRite, Non-traditional Christmas Colors
Die Cuttin Divas, Christmas in July
Word Art Wednesday, AG
613 Avenue Create, AG
Craftin Desert Divas, Christmas
CRAFT Challenge, Christmas
Crafty Hazelnut Christmas, Layer it up
Hiding in my Craft Room, Christmas in July
My Sheri Crafts, Christmas in July
Craft Your Passions, Christmas in July
Crafty Hazelnut, July Extra
Christmas Sweet Stamp, Kraft
Christmas All Year Round, Non-Traditional

Saturday, July 19, 2014

Be Yourself tag

Hello All!

The challenge this fortnight at Craft Hoarders Anonymous is to use a tag on a project.  As always, we have to use an item that is hoarded on the project.  There were four hoarded items on this tag: the silver and pearl button used on the ribbon cluster (I bought it well over 5 years ago), black and white twine (not used in almost 3 years), green burlap (don't even recall when I bought it!)  and my treasured Graphic 45 Secret Garden paper.  I was also able to dig into my scrap bin for some items which is always nice!
The tag base is corrugated cardboard die cut using a Sizzix tag die.  White crackle was applied to the corrugation and Scattered Straw ink was applied along the edges.  The daisy patterned Secret Garden paper was die cut using Spellbinders Postage Stamps.  Quietfire's "Be Yourself" was stamped on vellum (from my scrap bin) and die cut using Spellbinders' Circles.  White card stock (also from my scrap bin...yay!) was die cut using two of Spellbinders Feathers dies. 
I finished the tag this morning and in lieu of indoor photos I decided to go "on set" and into my gardens.  While snapping the tag photos I also snapped a few photos of some flowers in bloom in three of my gardens.  If there had not been shade on my other gardens I would have snapped some more.  Please ignore the unruliness- I was unable to poke around in the gardens in over a week.

Here are some of my daisies...
A couple of astilbes...
Fully opened roses...
Some daylillies...
Oh how do I love this time of year!  The world is alive and beautiful!  

I won't take up any more of your time.  Thanks so much for stopping by!  Have a great weekend.  :)
Hugs,
Kathy Jo

This tag is entered into the following challenges:
Craft Hoarders Anonymous, Tag
613 Avenue, AG
Word Art Wednesday, AG
TTCRD, AG

Thursday, July 17, 2014

Tuesday is Winsday at Quietfire...you could win!

http://quietfirecreations.blogspot.ca/
Hello Crafters!

Did you know that Quietfire Creations does a Tuesday Winsday?  On Tuesday Winsday a project is highlighted on the Quietfire blog and you could win the stamp(s) used and sometimes additional product!  This week Jutta's beautiful tulip card (very cool technique, clever upcycling) was highlighted and the stamp she used is the giveaway this week!  Woot-woot!

You still have time to enter!  How fun would it be to win a wonderful Quietfire stamp? 

I also have a giveaway on my blog that ends on the 28th.  Don't forget to leave a comment on yesterday's blog post for a chance to win the stamp set shown below:
We Are Never So Lost
Have a great day!  Thanks for stopping by!
Hugs,
Kathy Jo


Wednesday, July 16, 2014

Angel Card...and a GIVEAWAY!!!!

Hello Crafters!

Today is my day to post at Quietfire Creations and I chose the beautiful stamp "We are never so lost that our Angel cannot find us".  Isn't it lovely?  Well, if you agree then you are in luck...I am giving away the stamp to a lucky commenter on this blog post.  That's right, leave a comment on this post for your chance to win this stamp.  Want a second chance to enter?  Hop over to my blog post at Quietfire Creations and leave a comment on that post, too.  Feel free to say that you hopped over from my blog.  :)
Thanks so much for stopping by!  All comments entered before 5pm EST on Monday July 28th are eligible to win.  I will announce the winner on Tuesday the 29th.    
Good luck!
Hugs!
Kathy Jo

This card is entered into the following challenges:
Word Art Wednesday, AG
613 Avenue Create, AG
TTCRD, AG
Sister Act, AG
Crafting by Designs, Use A Sentiment
DL Art, July Linky

Sunday, July 13, 2014

Distressed Butterfly card

Hello!  How is your weekend thus far?  Are you enjoying the weather?  Getting some crafty time in?  Yesterday I went to Janice's house to see her newest family member: a super adorable wee kitten, Mushu.  In the afternoon our Saint Bernard's sister, Millie, came over.  The girls have "slumber parties" throughout the year and the girls love it...as do my hubby and I.
A few weekends ago I went to my favorite local crafty store, Carsand Mosher.  They have a discount card system and I was able to get 20% off an item. (Yes!!)  My item of choice was Sizzix' Butterfly Frenzy Decorative Die Strip.  (I know you are all shocked- I bought another die...and it had butterflies.)  For the card, I ran the die through my Calibur but not enough to cut entirely into the paper.  I raised some of the wings and added Walnut Stain ink along the edges.  I popped one butterfly out completely to make it look like it was flying into an open spot on the paper.
The "Butterfly" in the corner was from Quietfire's Butterflies/Dragonflies stamp set.  The stamp in the lower left corner was from Quietfire's Illuminations stamp set.  The butterfly scene was mounted on a scrap piece of woodgrain paper.  The card base was made using one of my favorite Spellbinders dies, Reflective Moment.   (Are you getting tired of seeing my cards using that die yet?  I hope not!)
Thanks for stopping by!  Have a good Sunday and stay crafty.  :)
Hugs,
Kathy Jo

This card is entered into the following challenges:
613 Avenue Create, Shaped AG
Word Art Wednesday, AG
DL Art, July AG
Wags 'n Whiskers, AG
Just For Fun, AG
Crafting by Designs, Use dies
Crafting from the Heart, AG
Crafty Girls, AG

Saturday, July 12, 2014

Graphic 45 Botanical Tea Birthday Card

Hello Crafters!

My friend, Janice, had her twenty-something-ish-plus-some birthday this week.  Her favorite paper is Graphic 45's Botanical Tea and we both collect tea cups so it seemed natural to make this card.

The front incorporates the stamp and die cut set from Sizzix/Graphic 45/Hampton Art "Tea Time".  The pink and white ribbon was a gift from Janice (matches Botanical Tea perfectly).  The circle die cut was made using Spellbinders Circles dies and Majestic Circles.
The inside has more Graphic 45 paper.  A half circle die cut from Majestic Circles was used to hold a gift card.
The Happy Birthday sentiment is an often used stamp set from Quietfire, Happy Family Days.
The back is more Botanical Tea.  The stacked tea cups is a stamp from Unity Stamps. 
Thanks so much for stopping by!  Hope you all are having a wonderful weekend!
Hugs,
Kathy Jo

This card is entered into the following challenges:
613 Avenue Create, AG
Word Art Wednesday, AG
DL Art, July AG
TTCRD, AG
Crafting from the Heart, AG
Crafting by Design, July AG
Crafty Hazelnut Patterned Paper, July AG
Sister Act, AG
Crafty Sentiments, AG
Fussy and Fancy, Girly
Sisterhood of Crafters, Birthday
Cute Card Thursday, Pretty papers

Tuesday, July 8, 2014

Masculine Birthday card

Hello Fellow Crafters!

Do you find that you tend to make cards that do not fit into envelopes well?  I do!  I decided to challenge myself and make a masculine birthday card that is "flat".  My husband picked out the paper and my challenge was set.  And yes, you read that correctly...I showed my husband possible choices for paper and he thought the globe paper from Bo Bunny's Weekend Market was "cool".
The paper was trimmed to size and mounted on kraft card stock.  Additional kraft paper was die cut using Spellbinders A2 Brackets Borders One.  "Happy Birthday" (Quietfire's Happy Birthday Plain & Simple) was stamped on ivory card stock and distressed in Vintage Photo and Walnut Stain.  Gold foil tape was adhered to the edge.  Green paper was die cut from Spellbinders Twisted Metal Tags and Accents and centered over the compass.  All edges were distressed in Vintage Photo and Walnut Stain.  Bling was applied as shown.
Easy card!  Hopefully it is "cool" for a masculine birthday card!  :)

Thanks for stopping by!  Have a great day.
Hugs,
Kathy Jo

This card is entered into the following challenges:
Kraft Journal, Sea and Sand
Crafty Hazelnuts Patterned paper, July
613 Avenue Create, AG
Word Art Wednesday, AG

Sunday, July 6, 2014

JustRite Sketch Challenge card- Blue and White card


Hello again!

JustRite posted a new challenge and I actually had time to participate...yay!  The challenge was to follow the sketch provided and use JustRite product.   
The background was stamped using Tufted Vintage Labels Seven Background Stamp in VersaFine's Majestic Blue and heat embossed.  Sprectrum Noir's CT2 marker was applied to each of the tufts as shown.  Next, Spectrum Noir's IB2 and the blender were used to add depth to each of the tufts.  Clear gloss gel was applied to the white areas.

The center stack is as follows: Cheery Lynn Doily with Squeezed Lemonade along the edge, For All You Do stamped in blue and die cut with Vintage Labels Three, "On Your Special Day" (Enjoy the Day Vintage Labels Four) die cut using Spellbinders Elegant Ovals and a butterfly die cut using Spellbinders Papillions Two.  Squeezed Lemonade was applied to the small details on the For All You Do stamp and also on the Butterfly.
This shot probably does not really show anything...I just thought the angle was neat.  :)
Thanks so much for stopping by!  Have a great week!
Hugs,
Kathy Jo

This card is entered into the following challenges:
Art Impressions - Use a doily
Aud Sentiments - Anything Goes
Brown Sugar #101 - Anything Goes
Cards Galore Encore - Use a Digi or Rubber stamp
Craft Your Passion - Ribbons
Crafting at the Weekend - Anything Goes
Crafting by Designs - Anything Goes
Crafting From the Heart #25 - Anything Goes
Crafty Sentiments - No Design Papers
DL Art - Anything Goes (1 per day)
Fan-tastic Tues - Anything Goes
Graph It - Anything Goes (with markers)
Just for Fun - Anything Goes
Loves Rubber Stamps - Anything Goes
Paper Creator - Anything Goes
Papertake Weekly - Anything Goes
Pause Dream Enjoy #13 - Many Layers
Sister Act #64 - Anything Goes
Through the Craft Room Door - Anything Goes
Tuesday Throwdown #202 - Anything Goes

My Craft Room

Happy Sunday, All!

The winds from Arthur have died down and power has returned...yay!  Yesterday afternoon I opened up the curtains in the craftroom and worked by natural light (although it was a cloud covered day) on some cards.  It was quite peaceful working without power on.  Does that sound strange?  I think the cards turned out ok and I hope my colors match!

Today I am sharing views of my craft room.  The idea to share my cluttered but happy space was due to the linky party at Craft Hoarders.  I have only shared my space once since I started blogging but I decided to be brave and share it again.  
The shot about is how it looked this morning.  It is the view when you first walk in the room.  (I still have project materials sitting out!)  The state of the room is pretty standard- sometimes it looks a little neater and sometimes...well...not so much. 

Before I go any further, I should say a little bit about it: the room is small.  The pictures were all taken with me leaning as far back in the room as possible.  Also, the room has been in transition this year.  A few months ago I was moving stuff to a spare bedroom to "upgrade" to a larger space.  At one point the stuff was frantically moved back as we had weekend company that was staying in the room.  Then, I slowly started to move the items back to the spare bedroom.  Two weeks ago one of my besties, Janice, gave me a huge storage unit that fit perfectly into my craft room.  Now, the stuff it almost completely moved back into the original room (LOL) but still needs to be organized...big time!  Hopefully the next "Fifth Week" linky at Craft Hoarders will result in me sharing a more organized room.  I will do a video then, too. 

Ok...back to the room...

A quick turn right and you see my die cutting area.
My die cutting table.  I keep post-its handy to hold my dies in place (the holder was a gift from Janice) and all of my boards are in the drawer under the machine.  You can also see two large bins in the background.  Those bins contain most of my dies.  
I just finished this organization on Friday.  The first container has all of my non Grand and non D-Lites Spellbinders.  Almost all of the dies have their own zip bag sealed to size.  The container to the right are the remaining Spellbinders and other manufacturer dies.  The dies are easily accessed at my die table and sometimes I just enjoy taking scrap paper and running my dies through.  Can you tell I like die cutting?  
Turn 180º and you see the crazy space packed with stuff.  It may look bad at first glance (or second...or third) but it easy for my to grab my stuff while I am at my desk.
Here is a straight on shot of my desk, aka The Crafty Command Center.  (Please pardon the poor photo quality.)  The basket on the desk contains adhesives and small stamp blocks.  The pink fabric item on the adjoining desk is a gift from Ruby (quilter and sewer extraordinaire) that I can toss scrap paper in and on top is a pin cushion.  On the floor is a three tier stand that has my Quietfire Stamps and ribbons.  The window trim needs repainting- some of it came off when I removed the plastic winter window covers- and as you can see, the room was purple before.  That's right- PURPLE.  Goodness...
Turn 90º and you can see the back of the room.  The storage unit is the awesomeness shown in this photo.  It is so big that it did not fit in the photo!  I still need to figure out the best way to store items in the unit so I will not open the doors on this tour.  :)
Finally, the sneaky storage space is shown below.  My wonderful hubby made the stamp shelves for many of my wood mounts.  The ribbon holder is actually a shoe holder that I converted to hold some (ahem) of my ribbon.
One thing I am in process of doing now is taking my ribbon off spools and neatly putting them in mini storage bags.  The clever idea came from the first Fifth Monday linky party at Craft Hoarders.  Pam showed how she stored her ribbon and I knew I had to do it!  Scroll down on her post here and you will see her neat and easy to access ribbon storage.

Thanks for talking this long winded tour of my small room!
Hope you all are having a great Sunday!
Hugs,
Kathy Jo