Pages

Wednesday, December 30, 2015

CHA Sneak Peek- new ECD birthday die

Hello Crafty Friends!

I am very excited to share another sneak peek of the soon to be released Elizabeth Craft Designs die designed by the ever-so-talented Suzanne Cannon.
http://www.elizabethcraftdesigns.com/products/a-way-with-words-happy-birthday-2-1161
The details of the birthday card holder are at Quietfire Design- feel free to hop on over. 
Thanks for stopping by!
Have a happy crafty day!
Big Hugs,
Kathy Jo

Thursday, December 17, 2015

CHA 2016 Sneak Peek- new Suzanne Cannon/Elizabeth Craft Design die "Dream"

Hello Crafty Friends!  Today is my day to post at Quietfire Design and I am so excited to share a project using Suzanne Cannon's die designed for Elizabeth Craft Designs: Dream. This is one of many new releases for CHA 2016!  Hop on over to the Quietfire Design Blog for more details on the card and for a link to the video showing off the new dies.
Thanks so much for stopping by!
Have a happy, crafty day.
Kathy Jo

Sunday, December 13, 2015

Graphic 45 Christmas card

Hello Crafty Friends!

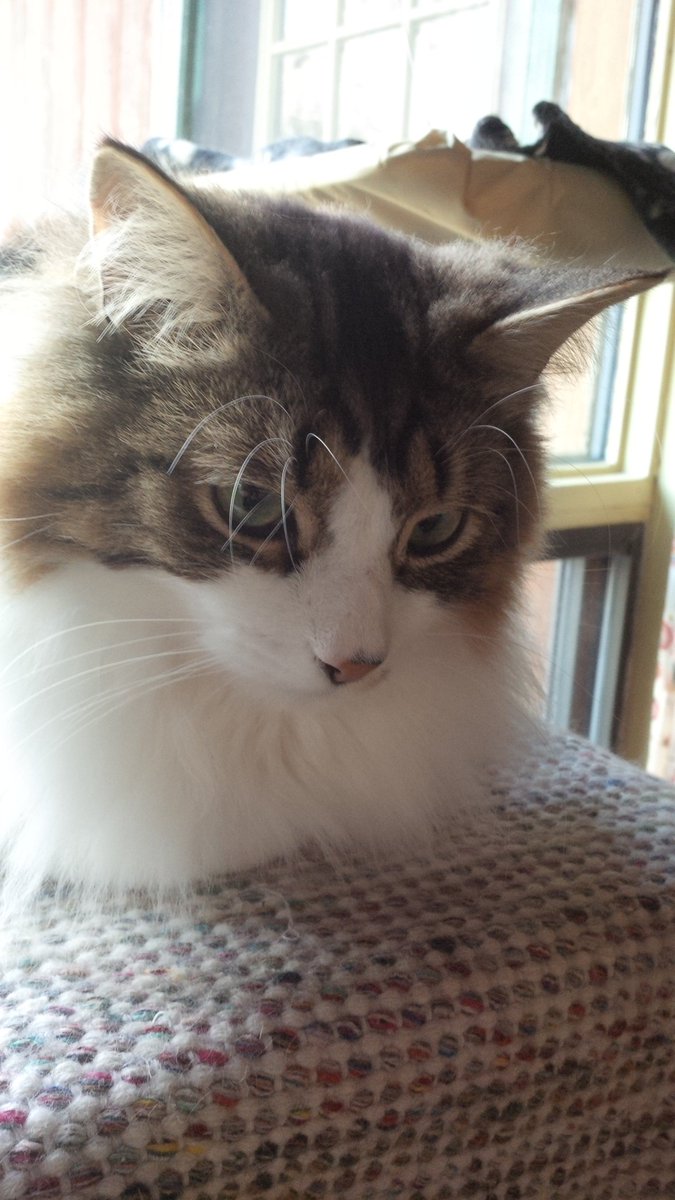
How is your weekend thus far?  I hope it has been good one.  The weekend here has been great.  Actually, I have been looking forward to this weekend for a few weeks now.  This is one of my favorite weekends of the year because yesterday my hubby and I picked out our Christmas tree and today is the annual Open House at BideAwhile- a local shelter for homeless animals.  It is an amazing shelter with the best employees and volunteers.  It truly is a special place. What makes this year even better is the memory of last year's open house.  Our family had lost our sweet kitty Sam earlier in 2014- it broke my heart as he was with me for over 17 years.  When he was gone, I told my husband I didn't want a new cat in the home for a long time.  It just hurt too much.  So, we went to the open house last year with no intentions of finding another family member...but one found us and his name was Nico.  He melted our hearts at first glance: he looked into our eyes and reached his paw out through his kennel trying to touch us.  It was if he was saying "I would like to be in your family" and we wanted him to be in our family, too.  He was a perfect fit and I cannot say how wonderful our home is with him in it.  Here is a picture of Nico the first day he was in our home.
Embedded image permalink
Isn't he a cutie?

I could talk about my furry family for a long time but that is not why you stopped by...hmm...how about we talk about crafting?  :)  Another Christmas card is completed and this one is Graphic 45 based.  It used papers from the Time to Flourish and Twas the Night Before Christmas collections.  The poinsettia and bird were fussy cut from the Time to Flourish papers and adhered using foam tape.  Of course Stickles was applied at will!
The crinkle ribbon was tied with ivory twine.  The beautiful Spellbinders die, Labels 40 Decorative Accents, was used with green card stock and pearls applied.
Distress inks were applied along all edges for a vintage touch.
Don't you just love Graphic 45 papers?  Beautiful papers!

Thanks for stopping by and reading my blog post.  :)
Have a happy, crafty weekend!
Big Hugs,
Kathy Jo

Saturday, December 12, 2015

Merry Christmas

Hello Crafty Friends!

Sharing a "quick-to-make" Christmas card today and it is the last of the Penny Black Christmas sticker cards.  The sticker set has proven to be a great purchase!  The images are so pretty- especially loving the bird stickers.

In addition to the image on the card front is Quietfire Design's beautiful "Merry Christmas" from the Merry Christmas Plain and Simple set:
Merry Christmas Plain & Simple, Set of 6 - Mounted
The sentiment was heat embossed onto Kraft card stock using red glitter embossing powder.
Red twine was tied along the spine... 
Stickles in Candy Cane was applied to the berries and Peacock applied to the bird.
Distress inks (Vintage Photo, Tea Dye and Walnut Stain) was applied to all edges.
The card was completed in a flash!  And the heat embossed stamped Merry Christmas matched the berries so well.  Another Christmas card complete.  (Yay!)

Thanks so much for stopping by!  Have a happy crafty day.
Big Hugs,
Kathy Jo

Friday, December 11, 2015

Winter Birds card and fabric background tutorial

Hello Crafty Friends!

One of my favorite things to do in my craft room is taking supplies and trying to find new ways to use them.  Sometimes I am happy with the results and sometimes I chalk up the time spent to "just having fun". The card today was happy results: I created a fabric patterned background to match a sweet winter birds image.

First I applied Distress Inks in Tumbled Glass, Bundled Sage and Antique Linen to DCWV's adhesive fabric.  The fabric was kept on the adhesive sheet.
After drying, the fabric was dry embossed using Elizabeth Craft Designs' Berry Branch folder.  A brayer was run over Distress Ink in Vintage Photo and then run over the embossed image.  (Please note that next time I will try Archival Ink on the background because the Vintage Photo did "spread" and the branches did not stay as crisp images.  However, it worked with this card because the image background had smudges of Vintage Photo along the edges.)
Enamel Accents was randomly applied to look like gently falling snow.
After drying, the fabric was cut to size and mounted onto white card stock.  This "flattened" my embossed image but the pretty pattern remained.  The bird image was cut to size, mounted on red card stock and then mounted to the fabric background.  Stickles in Candy Cane was applied to the background and image berries.
A single green crinkle ribbon bow was added and the card was complete.

While creating the background, I was unsure how well it would match the image.  In the end, I was very happy with the results as the background did match well.  And the card front is super cute!

Thanks for stopping by.   Hope you enjoyed the background tutorial and the card.  :)
Have a happy crafty day!
Big Hugs,
Kathy Jo

This card is entered into the following challenges:
Word Art Wednesday, AG
Craftin Desert Divas, Christmas

Thursday, December 10, 2015

Winter Birdie Holiday card using Cheery Lynn dies

Hello Crafters!

Can you believe that Christmas is just a couple of weeks away?  Time is flying by.  We are slowly finishing off our Christmas list and I am finishing up the Christmas cards.  'Tis the season to be busy!

For the first time I purchased the set of Christmas Song stickers from Penny Black.  This set had different winter scenes and I thought they would be neat to try on card fronts.  The card today used a sweet red bird on festive branch.

First I stamped blue card card stock with IO's Cover a Card Woodgrain and green card stock with a Hero Arts background stamp (S5501).  They were trimmed with gold and mounted on a Kraft card base.  Cheery Lynn's Sophia's Heart doily die cut ivory card stock.
The bird scene was mounted on card stock and fussy cut. Gold trim applied.  Stickles was applied to the snowflake, berries and leaves.  A wood button was placed on top of Cheery Lynn's Pine Branches.
The lovely red die cut is Cheery Lynn's Southern Charm Valance.
Pearls were placed on corners and the card was complete.  
I have made a few other cards using the sticker set which I will share later this week.  

Thanks for stopping by!  I do hope you enjoyed the card.  :)
Have a happy crafty day!
Big Hugs,
Kathy Jo

This card is entered into the following challenges:
ScrapyLand, AG
Cheery Lynn, Red and Green
613 Ave Create, AG
Word Art Wednesday, AG
Simon Says Stamp Monday, Stamp it


Monday, December 7, 2015

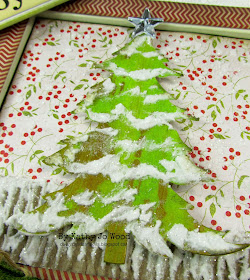
Tim Holtz "JOYFUL" Upcycled Holiday Wall Hanger

Hello Crafty Friends!

Although I have spoken off and on about this for a couple of years now, it looks like I will be moving my crafty space to a larger area of our home.  It will be a lot of work but will be well worth it!  My current craft area has a usable work space that is smaller than a 12" x 12" scrap page- which makes working on some projects very difficult.  The new craft area is a guest room/storage room and requires items in the room to be removed.  One of those items is a wall hanger that hung behind the entry door.  It was about to be wrapped and added to the Salvation Army donation bin when I realized that it would be a great upcycle project.  It took many fun steps to create this project and it felt good to breath life into the old hanger.

First I applied white Distress Crackle to the frame and when dried I lightly applied Brushed Corduroy Distress Ink to accentuate the crackle.
White card stock had Distress Paint in Twisted Citron, Peeled Paint and Crushed Olive applied.  After drying, Tarnished Brass Paint was applied, spritzed with water, dried slightly and a paper towel used to remove the wet ink.  It gave the tree an aged metallic appearance.  It was die cut with Sizzix' Christmas Tree #2, Ranger Texture paste applied and sprinkled with Tim Holtz' Clear Rock Candy glitter. Tim Holtz' Alterations star was adhered on top.
TH stencil (Speckles) and more embossing paste was used on a piece festive paper from TH' Yuletide paper pad.  Rock Candy glitter was applied.
A piece of corrugate was torn, embossing paste and glitter applied. 
Chevron paper from the yuletide pad was cut and used as a border around the image.
"JOYFUL" from TH flash cards was mounted on a frame from Yuletide paper.  Silver glitter paper was die cut using Sizzix' snowflake background die.  Red dots were created using Stickles in Candy Cane.

 A big double bow was added to the bottom and the wall hanger was complete!
The wall hanger will be hung in the entryway this holiday season and I will smile thinking about how I found a new use for the old wall hanger.  :)  

Thanks for stopping by!  I do hope you enjoyed the upcycled project.  
Have a happy crafty day!
Big Hugs,
Kathy Jo

Thursday, December 3, 2015

Gilded "We are like Snowflakes"

Hello Crafters!  

Today is my day to share a project at Quietfire Design and I am sharing a gilded Christmas card using Quietfire's "We are like Snowflakes" stamp:
We Are Like Snowflakes - Mounted
Here is a close up of the stamped sentiment.  Such a sweet saying and I love the wee hearts in the snowflake!

Thanks so much for stopping by! For more details and Quietfire crafty inspiration hop on over to the Quietfire Design blog.

Have a happy, crafty day!
Big Hugs,
Kathy Jo