Pages

Sunday, November 29, 2015

Merry Christmas! and blog hop reminder

 Hello Crafty Friends!

First, just a friendly reminder that today is the last day to leave a comment in the Way With Words blog hop.  Every blog participating in the hop has a die or stamp for a winning comment.  Start your blog hop here for more info
http://quietfirecreations.blogspot.ca/

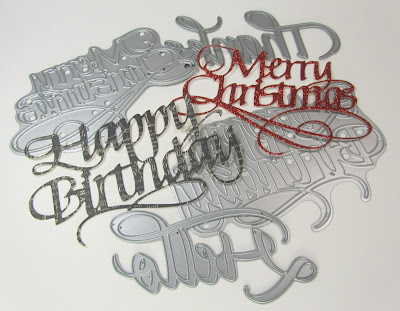
December 1 is tomorrow and the Christmas cards will be frantically finished by some crafters- like me, as an example.  Today I am sharing a quick and elegant card using Elizabeth Craft Designs Merry Christmas die designed by Quietfire Design's Suzanne Cannon.

The die was used to cut red glitter paper and white card stock.  Musical paper from Tim Holtz' Yuletide paper pad was mounted on white card stock.  A piece of seam binding was wrapped as shown.  The Merry Christmas die cuts were offset and adhered on the paper. 
The layered assembly was mounted on a tent fold Kraft card base.  A double seam binding bow was the finishing touch. 
Yes, it was a quick and easy card but the results are elegant.  I really like how the red glitter die just "pops" off the card.  Such a pretty die!

I had better get back to card making.  The cards need to be ready for mailing soon!

Thanks for stopping by!  I hope you enjoyed the card and I wish you luck in the blog hop!
Big Crafty Hugs,
Kathy Jo

This card is entered into the following challenges:
Simon Says Stamp Wednesday, AG
Word Art Wednesday, AG

Tuesday, November 24, 2015

Sentiments of the Season Blog Hop- Tutorial and Giveaway

Welcome to the Quietfire Sentiments of the Season Blog Hop! We’re celebrating the season with projects using our favorite Quietfire sentiment stamps and dies. We have some great ideas to share with you!
We’re giving away a prize on each of the Sentiments of the Season blog posts. The posts will be on Designers’ personal blogs and one on Quietfire Creations. All you have to do is leave a comment on the Sentiments of the Season blog posts and you will be entered for a chance to win a Quietfire stamp or die from that blog. Each designer will randomly choose the winner from their comments.

Here is our schedule: 
Day 1- Monday November 23 : Teresa and Yogi
Day 2 -Tuesday November 24KathyJo and Judi Kauffman
Day 3 - Wednesday November 25Wanda and Yvonne
Day 4 - Thursday November 26Robyn and Selma
Day 5 - Friday November 27Diana and Suzanne

The deadline for leaving comments is Sunday November 29, 2015 at midnight PST. Winners will be posted shortly afterwards here on Quietfire Creations. Good luck and have fun!
http://www.quietfiredesign.ca/Quietfire-Dies-from-Elizabeth-Craft/
For the Blog Hop I thought I would share some new techniques for your dies. As many of you know, I am a huge die junkie. Dies are so fun to use and sometimes I spend hours just running dies through my machine to try out new materials or layouts.

Today I want to share die techniques that do not involve embossing or cutting, but how to use your dies as stamps. Quietfire dies are so beautiful…why limit them to only die cutting and embossing? This post is a long one so grab a cup of tea and enjoy!

Before we start:
* Make sure your die is clean and all paper tidbits are removed from the die.
* It is best to work with thinner, flexible papers- card board and heavy weight paper (such as 110lb) may be too heavy. Textured surfaces should be avoided. When in doubt, test it out.
* Place your material on a flexible stamping mat. Stamps are flexible to help with stamping- dies are stiff and need flex under the paper.
* Remember to clean your die after stamping. You don’t want to ruin future die cut items by covering them with ink.
* Although dies can be “stamped”, you will not have lovely fine details like you would from an actual stamp. Keep that in mind when designing your project.

Die stamp setup:
You do not want your die permanently attached to a stamping block so only use a small amount of removable tape on the back of your die. Here was my initial setup:
I placed my die on a block with removable tack tape. My whole block was covered with the tape so it was removable…but was very tricky to get off one time. I do not recommend using this setup if your block is super tacky.

Just to re-iterate: You want to avoid bending your die so limit the amount of removable tape used. A small amount of removable tape will make the removal process easier and will protect your die.

Die Stamping- Vellum:
Just like with a stamp, Archival Ink works well on vellum. Apply the Archival Ink onto the die stamp setup. Test the image on a scrap piece of paper. You may want to test a few times to figure out your pressure required. After stamping on the vellum you may notice some ink transferred in addition to your die lines. Use a Q-tip and some stamp cleaner solution on the vellum to remove the stray ink. Dry with a heat gun.
You could just leave the image as is but I chose to emboss on the back side of the vellum. It created a nice embossed image with a black outline.
Die stamping- Chalkboard:
The Quietfire dies work perfectly for your chalkboard paper project. After cleaning the die, heavily apply Versamark. Stamp the die on black paper and heat emboss using white embossing powder. The letters on my example were scribbled in with Sakura’s Souffle gel pens:
I really liked the way the chalkboard style turned out. The partially filled in letters look very cool against the black background. (Please note that if you are looking for stamps in the same style, check out Quietfire’s Fill 'er-up series.)
A peek at the inside- more of the patterned papers and "Merry Christmas" Quietfire stamped sentiment.
Die Stamping- Watercolor:
The chalkboard style was awesome but watercoloring turned out to be my favorite style for die stamping. After playing for some time with the watercolor technique, I decided to mix up my stamping. For the below card I created a watercolor background using Barn Door, applied a wee bit of water in the center (to lighten the watercolor) and then heat dried. Next I applied Archival Ink in Coffee onto the die, stamped and then heat dried. Merry Christmas was stamped over the Believe using Jet Black Archival Ink and heat dried. Note that I stamped the Believe and Merry Christmas over the lighter colored red area for emphasis. On a craft mat, mix Barn Door, Vintage Photo and water. Apply the watercolor mix inside the Believe letters.
The seam binding was dyed using the leftover ink from mixture above. My hands were an inky mess at this point but I did not care because I having a blast playing in the craft room!
I do hope you liked the die stamping exploration…I know I enjoyed playing with the dies! If you do make a project using the above techniques, please link back to this post. I will make sure to leave some love on your blog, too. Talking about leaving love, don’t forget to leave a comment for your chance to win a new stamp or die from Quietfire Design. Your next stop on this hop is the ever so talented Judi Kauffman.

Thanks for stopping by! Good luck!
Big Crafty Hugs,
Kathy Jo

The cards above are entered into the following challenges:
Simon Says Stamp Wednesday, Christmas
613 Avenue Create, AG
Word Art Wednesday, AG

Saturday, November 21, 2015

Gift card holder using G45 papers and Quietfire Design sentiment

Hello Crafty Friends!

I learned a few years ago to keep gift card holders in my card stash- especially at Christmas time.  This year I decided to make gift cards similar to the gift card template I used in March.  The base for the card shown today is 4" and the flap was 2".
Using the edited 4x12 template above, I formed the card base.  An image was cut from Graphic 45 paper and double matted on gold and red card stock. The sentiment "Compliments of the Season" is from the same collection.
Gold marker was applied to the edges of the image, sentiment and card base.
The flap tucks under the image.  The image was applied using foam tape.
Profile of the card.
The left side has a pocket for a gift card...
...and the right side has Quietfire Designs' lovely Christmas sentiment.
When the card was completed I added Stickles to the holly, tree and frame.

The card is festive, of course I love the Graphic 45 papers and three gift card bases can be made from one 12x12 Graphic 45 sheet.  

Supplies used:
- Quietfire Design stamp "Christmas is a piece of home"
- Patterned papers: Graphic 45 (Christmas Past, Twas the Night Before Christmas)
- Card stock (red, gold)
- Sakura gold pen, foam tape, Stickles, Jet black Archival ink

Thanks for stopping by!  Have a great weekend!
Big Crafty Hugs,
Kathy Jo

This card is entered into the following challenges:
613 Avenue Create, AG
Word Art Wednesday, AG
Simon Says Stamp Wednesday, Christmas

Sunday, November 15, 2015

"You're my Purr-fect cup of tea"

Hello Crafty Friends!

How is your weekend thus far?  We are in day 6 of our roof replacement.  This weekend they are applying the  shingles to the area above our bedrooms and my craft room.  All I can hear in the house is "Chunk!...Chunk!...Chunk! Chunk! Chunk!".  Surprisingly, it does not bother me as I know that each nail sound means it is one nail closer to our roof being completed.  However, the cats are not as understanding as I am because their day long cat naps are non-existent.  Luckily they only have to wait one more week and they will return to their lazy kitty cat days.  Today's project is dedicated to my sleep deprived, cute-as-a-button kitties.

Steps to create the card:
Stamp image onto water color paper using Archival Ink. Using Distress Markers and waterbrush, color image. 
Dye seam binding using Distress Marker and water.
Die cut image and patterned papers.
Create die cut tent fold card.  Stamp sentiment on inside of card.
Adhere layers to front of card.  Apply Glossy Accents to tea cup and handle. 
Supply list:
Darcie's Stamps (Purrfect Day)
Ranger Ink (Jet Black Archival Ink, Clear Glossy Accents, water brush)
Distress Markers (Spiced Marmalade, Peacock Feathers, Mustard Seed, Hickory Smoke, Spun Sugar)
Spellbinders dies (Labels One Grand, Scalloped Labels One, Decorative Labels One)
Seam Binding, Watercolor paper, Ivory card stock

Thanks for stopping by!  I do hope you enjoyed the card.
Have a happy crafty day.  :)
Hugs,
Kathy Jo

This card is entered into the following challenges:
Word Art Wednesday, AG

Friday, November 13, 2015

Guest Designer- Elizabeth Craft Designs

Hello Crafty Friends!

Great news: I am a Guest Designer today at the Elizabeth Craft Designs blog!

For my project I upcycled a frame a created a festive, crackled Believe decoration.  Feel free to hop on over to the Elizabeth Craft Designs blog for more project details.  :)

Big Crafty Hugs,
Kathy Jo

Tuesday, November 10, 2015

"Holiday Wishes" card using Graphic 45's Time to Flourish

Hello Crafty Friends!  How are your holiday cards coming along?  My card stash is slowly growing and now I am trying to use up some of the leftover patterned paper from other cards.  Today's card was created almost entirely from leftover scraps- excluding the card base and the checkered green background.  Feels great to use those scraps!

Crafty Steps:
Use Pen Touch marker to create gold pearls.  (refer to technique here)
Create Kraft tent fold card base.  Cut patterned papers and Kraft card stock to size. Assemble as shown.


Dye seam binding using Distress Stain.


Apply Stickles to leaves, flowers, etc. Adhere pearls, ribbon, twine and button 


Easy peasey!  Another festive card for this holiday season.

Crafty goodies used for this card:
Graphic 45's Time to Flourish papers and scrap patterned paper
Kraft card stock
Seam binding, Distress Stain (Barn Door and Festive Berries)
Stickles, Twine, Pearls, Pen Touch gold marker, antique metal button

Thanks for stopping by!  Hope you have a happy crafty day!
Big Hugs,
Kathy Jo

Saturday, November 7, 2015

"Being Thankful...for you"

Hello Crafty Friends!

It is a beautiful day here in Nova Scotia.  Earlier today two of my friends and I went north to Truro for craft supply shopping.  Lovely drive and temperature was perfect: 21º C (70ºF).  So nice! Although the calendar and fallen leaves say it is late fall, the temperature proves otherwise.

I would like to share a card I completed using Quietfire Design's sweet Being Thankful stamp set:
Being Thankful, Set of 6 Stamps - Mounted
Below are the steps used to create the card:

  • Create tent fold 4.25" x 5.5" Kraft card stock base.
  • Stamp Being Thankful on ivory card stock. Die cut.


  • Stamp For You on ivory card stock.
  • Die cut hearts.
  • Assemble patterned paper and Kraft card stock on front and inside as shown

Products used:

Thanks so much for stopping by!  Have a great day!
Big Crafty Hugs,
Kathy Jo

This card is entered into the following challenges:

Thursday, November 5, 2015

"Snowflakes are kisses from heaven"

Happy Friday, Crafty Friends!

The leaves may still be falling here but I am thinking of snowflakes.  I am not a huge fan of snow- mainly the shoveling of it- but I do think falling snow is very peaceful and beautiful.  I also like the fact that the snow hides any weeds that are in my lawn.  :)

Today's card is all about snowflakes.  It's focus is Quietfire's oh-so-sweet stamp, Snowflakes are kisses:
Snowflakes are Kisses - Mounted
The goal of the card was to make it elegant yet simple.  This card is easy to mass produce.  

Here are the steps to make this card:
  • Stamp sentiment onto white card stock. Die cut. Die cut decorative oval.
  • Emboss white card stock with snowflake embossing folder.  Cut to size and add Stickles to snowflakes and border.

  • Create tent fold white card base. Adhere black card stock and embossed card stock. Using foam tape adhere oval die cuts.
  • Adhere sheer bow.

Quick and easy!

Here the list of products used:
Quietfire stamp (Snowflakes are kisses)
Martha Stewart embossing folder (Snowflake Design)
Ranger Ink (Stardust Stickles and Jet Black Archival Ink)
Spellbinders dies (Ovals, Oval Bliss)
Sheer ribbon, white and black card stock, foam tape

Thanks for stopping by!  I hope you have a happy crafty weekend!
Big Hugs,
Kathy Jo

Wednesday, November 4, 2015

"When in doubt...twirl!"

Hello Crafty Friends.

Are you into watercoloring?  Every so often I pull out the watercolor paper, my water based inks (love using my Distress Markers), and stamp images to color.  This wee toad in a tutu stole my heart- she so had to be colored.  Her happy image pairs up perfectly with Quietfire's "Twirl & Enjoy" stamp set:
Twirl & Enjoy, Set of 3 Stamps - Mounted
What a happy set, indeed. :)

Below are the steps used to make this card:
  • Stamp frog image onto watercolor paper using Archival Ink. Dry. Watercolor. Dry. Apply Glossy Accents on frog body, add Stickles to tutu and crown.  Dry.
  • Die cut image. Outline window die onto pink paper and fussy cut. Mount on patterned paper and on tent fold card. Add flowers.
  • For inside of card, stamp text onto card stock and mount onto patterned paper. Add coordinating strip on bottom as shown.

Materials used:
Quietfire Stamp (Twirl & Enjoy set)
Stampendous Stamp (TuTu Toad)
Spellbinders die (Arched Window One)
Ranger Ink: Distress Markers (Mowed Lawn, Peeled Paint, Mustard See, Spun Sugar, Worn Lipstick, Broken China), Glossy Accents, Stickles (Stardust), Archival ink (Jet Black)
Other: misc flowers, patterned paper, ivory and pink card stock

Thanks for stopping by!  Hope you have a happy, crafty day.
Hugs,
Kathy Jo

This card is entered into the following challenges:

Monday, November 2, 2015

Tim Holtz Thankful Fall inspired card

Hello Crafty Friends!

Fall is such a beautiful time of year.  I love driving to and from work and seeing Nature's Art Show.  The colors are so vibrant, uplifting and gorgeous.  The fall colors inspired the card I am sharing today.

Here are the steps I used to make this card:
  • Apply Distress Inks in Peeled Paint, Scattered Straw, Spiced Marmalade, Festive Berries, Vintage Photo and Walnut Stain onto card stock.  Dry. Stamp background with Archival Ink. Dry. Flick water onto background. Dry. Spritz with gold shimmer mist.  Distress Edges with nail file or distresser.  Apply Vintage Photo and Walnut Stain to edges.
  • Apply Distress Markers in Peeled Paint, Festive Berries, Barn Door and Vintage Photo onto leaf stamps.  "Huff" on stamps and stamp onto paper. Fussy cut around leaves. Apply Distress Crackle. Dry. Apply Distress Ink (Vintage Photo and Walnut Stain) to entire surface and edges.  Wipe off surface to reveal ink in cracks.
  • Die cut branch from Kraft paper.  Apply Vintage Photo and Walnut Stain to branch. Apply Stickles as shown.
  • Dye 1/2" seam binding using Peeled Paint ink and water.
  • Dye 1" ribbon using Distress Inks used on background.
  • Cut band using Kraft card stock.  Distress edges with file and ink.

  • Assemble to gold glimmer card stock.  Assemble to tent fold card stock.


Products used:

  • Tim Holtz: Thankful Silhouette stamp set, Stickles, Distress Ink (Festive Berries, Dried Marigold, Peeled Paint, Scattered Straw, Vintage Photo, Walnut Stain), Crackle, Distress Markers (Peeled Paint, Festive Berries, Barn Door and Vintage Photo), Core'dinations paper
  • Memory Box die- Berry Sprig
  • Kraft card stock
  • Seam binding, twine, gold glitter card stock, Archival ink (coffee), nail file, gold shimmer mist

Thanks so much for stopping by!  I do hope you enjoyed the card and that you are enjoying your fall!
Big Crafty Hugs,
Kathy Jo

This card is entered into the following challenges:
Related Posts Plugin for WordPress, Blogger...