
Here is our schedule:
Day 1- Monday November 23 : Teresa and Yogi
Day 2 -Tuesday November 24: KathyJo and Judi Kauffman
Day 3 - Wednesday November 25: Wanda and Yvonne
Day 4 - Thursday November 26: Robyn and Selma
Day 5 - Friday November 27: Diana and Suzanne
The deadline for leaving comments is Sunday November 29, 2015 at midnight PST. Winners will be posted shortly afterwards here on Quietfire Creations. Good luck and have fun!
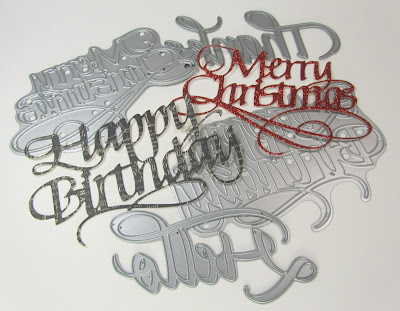
Today I want to share die techniques that do not involve embossing or cutting, but how to use your dies as stamps. Quietfire dies are so beautiful…why limit them to only die cutting and embossing? This post is a long one so grab a cup of tea and enjoy!
Before we start:
* Make sure your die is clean and all paper tidbits are removed from the die.
* It is best to work with thinner, flexible papers- card board and heavy weight paper (such as 110lb) may be too heavy. Textured surfaces should be avoided. When in doubt, test it out.
* Place your material on a flexible stamping mat. Stamps are flexible to help with stamping- dies are stiff and need flex under the paper.
* Remember to clean your die after stamping. You don’t want to ruin future die cut items by covering them with ink.
* Although dies can be “stamped”, you will not have lovely fine details like you would from an actual stamp. Keep that in mind when designing your project.
Die stamp setup:
You do not want your die permanently attached to a stamping block so only use a small amount of removable tape on the back of your die. Here was my initial setup:

Just to re-iterate: You want to avoid bending your die so limit the amount of removable tape used. A small amount of removable tape will make the removal process easier and will protect your die.
Die Stamping- Vellum:
Just like with a stamp, Archival Ink works well on vellum. Apply the Archival Ink onto the die stamp setup. Test the image on a scrap piece of paper. You may want to test a few times to figure out your pressure required. After stamping on the vellum you may notice some ink transferred in addition to your die lines. Use a Q-tip and some stamp cleaner solution on the vellum to remove the stray ink. Dry with a heat gun.


The Quietfire dies work perfectly for your chalkboard paper project. After cleaning the die, heavily apply Versamark. Stamp the die on black paper and heat emboss using white embossing powder. The letters on my example were scribbled in with Sakura’s Souffle gel pens:


The chalkboard style was awesome but watercoloring turned out to be my favorite style for die stamping. After playing for some time with the watercolor technique, I decided to mix up my stamping. For the below card I created a watercolor background using Barn Door, applied a wee bit of water in the center (to lighten the watercolor) and then heat dried. Next I applied Archival Ink in Coffee onto the die, stamped and then heat dried. Merry Christmas was stamped over the Believe using Jet Black Archival Ink and heat dried. Note that I stamped the Believe and Merry Christmas over the lighter colored red area for emphasis. On a craft mat, mix Barn Door, Vintage Photo and water. Apply the watercolor mix inside the Believe letters.


Thanks for stopping by! Good luck!
Big Crafty Hugs,
Kathy Jo
The cards above are entered into the following challenges:
Simon Says Stamp Wednesday, Christmas
613 Avenue Create, AG
Word Art Wednesday, AG
A fantastic post Kathy Jo with some wonderful tips. Have never used my dies for stamping but the results are fabulous so I might have to try it sometime!! Your cards are gorgeous!!
ReplyDeleteWOW wow WOW
ReplyDeleteI confess that I am a DIE ADDICT and think that the techniques you have shared today are EXCITING, I look forward to getting inky fingers with my dies and think it's awesome to have ANOTHER reason to get more dies to feed my addiction :)
ALL of your cards are BEAUTIFUL and while I LOVE the vellum and the chalkboard cards, I ADORE your watercolour card!!!
THANK YOU for sharing your CREATIVE and INKY INSPIRATION Kathy Jo!!!
Fabulous techniques!! I have never tried any of them before. I really love the effects you got. That chalkboard look is amaaaaaazing!!! Watercolor is always a fave, too, and that red card is magnificent.
ReplyDelete<3 J
jwoolbright at gmail dot com
HerPeacefulGarden.blogspot.com
These are awesome Kathy Jo. Thanks for the inspiration - another exciting way to use those dies! I love that you can make them whatever color you want, rather than just the five colors of the ink transfer sheets. The chalkboard one is especially cool with this technique.
ReplyDeleteThanks for sharing these great techniques, amazing what you can do with dies. I think the red one is my fav but the chalkboard look is really nice also. Cheers and have a great day!
ReplyDeleteFabulous post, Kathy Jo!!!!!!!!!!!!!!
ReplyDeletewow, how creative. I love all the different ways that you used the die. wonderful.
ReplyDeleteThanks for sharing these great tips Kathy!!! I really love these awesome techniques and the way you described beautifully step by step! The chalkboard and distressed look is fabulous!
ReplyDeleteWhat great ideas - love it!
ReplyDeleteWhat a cool technique and the die you have used is so beautiful
ReplyDeleteCheers
Dr Sonia
That looks really fantastic! Thank you for the inspiration and the ideas!
ReplyDeletenice techniques. glad you had fun BIG GRIN. Have a great day
ReplyDeleteWow! Great. Idea, wonderful dies! Anxious to try this technique
ReplyDeleteThis is so beautiful... i love messy kind of projects :) Thanks for sharing!
ReplyDeleteWow both cards are beautiful and what a cool tech. even though it's messy I love it .
ReplyDeleteAbsolutely Beautiful!!! Awesome technique! TFS
ReplyDeleteHave a blessed day,
Migdalia
*Crafting With Creative M*
Any tutorials on YouTube?
ReplyDeleteHi Marianne! Thanks for leaving the comment on my blog.
DeleteUnfortunately I do not have any videos yet. But Perhaps the third technique (stamping and watercolors) may require one. Thank you for planting the seed. :)
Good luck on the draw!
I will have to try that. Sizzix also has a product (similar to using carbon paper) that you can use & roll the die with the sheet of transfer paper through the Big Shot to get the same result. I found your blog through FB Stambing Enablers group. Thanks for sharing such great cards.
ReplyDeleteUnknown above is Mary Schmidt
ReplyDeleteI really enjoyed reading this, great tips and technique. TFS! Your cards are both beautiful!
ReplyDeleteIsn't it fun to get messy and know it's for a good cause.
ReplyDeleteI love the different cards.
The chalkboard card is so pretty - have to remember that idea.
The red with the green background is so pretty.
thanks for sharing some wonderful cards.
Very cool idea...gonna try this one! Beautiful card!
ReplyDeleteOh my, what amazing techniques! Never would think of this myself. Sigh. I especially am drawn to the vellum. Will give it a go for sure. A question about the watercolor technique. You said you filled in the die with the blended inks. Doesn't it move & leak when you turn it over to stamp? Having difficulty picturing it without spots all over! Lol Thank you, Kathy Jo.
ReplyDeleteWhat an awesome technique this is!! I never would have thought to stamp with my dies this way!! Your cards all look amazing!! Thanks for the inspiration my friend!! Have a great day :)
ReplyDeleteLisa
A Mermaid's Crafts
WOW! A new way to use dies! These were great great tutorials. TFS
ReplyDeleteSo very cool!
ReplyDeleteI'm amazed! Beautiful cards and such a fantastic technique! I'm wowed! TFS!
ReplyDeleteWow...sooo many different uses for these amazing dies! Love your tutorial. Beautiful samples. Thanks for the inspiration! :)
ReplyDeleteAwesome tutorial Kathy Jo. I really love the watercolor card, although they are all beautiful! Thanks for the wonderful inspiration.
ReplyDeleteBeautiful card. Thanks so much for sharing the technique!
ReplyDeleteLoved your blog with all those fun and wonderful tips and ideas. The cards are each so unique and lovely. What a great way to make your dies even more versatile. Great ideas. Thanks for sharing the fun
ReplyDeleteI do believe Kathy, that this is a great card. :)
ReplyDeleteWow, great technique! Never would have thought of that!
ReplyDeleteWhat great ideas to use the dies for stamping -- really like the sample with vellum.
ReplyDeleteOh my gosh, these are fabulous! You are sooooooo creative!
ReplyDeleteWowza!!! Now I need time to play with my dies as stamps!!! I need more hours in the day, but for sure am going to pass this on to all my local stamping friends who have dies :)
ReplyDeletewonderful cards and I'll have to go back and reread your tips and techs. sounds really interesting!
ReplyDeleteBeautiful cards,
ReplyDeletethanks for the great tips!
Dies as stamps...what a great idea! Love your projects!
ReplyDeleteBeautiful card- very interesting technique with the die!!!! Am loving the sentiment done in that font!!!!
ReplyDeleteGreat cards and tutorials Kathy Jo!
ReplyDeleteWonderful card!! I've never thought of using my dies as stamps, and, I really like the effect!
ReplyDeleteGosh I learnt so much with your post. Cant wait to try these techniques. Many thanks.
ReplyDeleteBeautiful. Thanks for the ideas.
ReplyDeleteBeautiful! You always inspire! :) Thanks for the tutorials! Hope you are enjoying this beautiful evening...so nice and bright out there! :)
ReplyDeleteFun techniques, I must try with my new dies!
ReplyDeleteTerrific technique!
ReplyDeleteLove learning different
ways to use the dies.
Carla from Utah
Awesome things! Thanks for posting. It inspired me on creating some Holiday crafting cards.
ReplyDeleteHow innovative! I would never have thought of using the dies as stamps. The water color card is awesome! Definitely ideas I will try in the future! l Thanks!
ReplyDeleteFound this link via Shona E, and this is fascinating. What awesome techniques, enjoyed immensely, as I am a die junkie too! Each card is just beautiful, and aren't you so clever to figure out how to do these cool looks. TFS & Happy Thanksgiving.
ReplyDeleteWow!! This card is great. Don't you just love the word dies they make it so easy.
ReplyDeleteRene from OZ xo
Love all the ways you used the die for stamping. You are so very clever!
ReplyDeleteThis explains why your hands were red...
ReplyDeleteYour Hubby
Thanks for these great new ways to use dies.
ReplyDeleteThanks for sharing the techniques.
ReplyDeleteNico
Thanks for all of the sweet comments!
ReplyDeleteThank you for sharing these techniques. I am excited to give it a try.
ReplyDeleteThank you for sharing these techniques. I am excited to give it a try.
ReplyDeleteThanks for all the tips on how to use the dies. I have a few of the one word dies so will be playing soon. The cards were gorgeous
ReplyDeleteThanks for all the tips on how to use the dies. I have a few of the one word dies so will be playing soon. The cards were gorgeous
ReplyDeleteBeautiful.
ReplyDeleteLove what you did with stamping with the die. Thanks for the instructions. I have not tried this technique before, but you have inspired me to try it. I, too, enjoy inky fingers. It generally means I am having a great time "playing".
ReplyDeleteAwesome techniques and cards; thanks for sharing
ReplyDeleteI really like the red & green in your card.
ReplyDeleteA blog comment added by Carmelita Cechetto-Shea. She dropped me a line commenting on the post but could not leave a comment. This one is entered by me for her. :)
ReplyDeleteThanks for the ideas for these dies!
ReplyDeleteGorgeous card. Love the technique.
ReplyDeleteWonderful!! Looks like you had a blast, too!
ReplyDeleteThanks for the detailed directions for each of you experiments! Isn't it nice to have time to play, with such fantastic results?
ReplyDeleteThis is an awesome technique. thanks for sharing.
ReplyDeleteI love the watercoloring. Thanks for sharing.
ReplyDeleteBeautiful cards. Thanks for all the techniques!
ReplyDeleteWow! Thanks for the tips and techniques. Thanks!
ReplyDeleteLove seeing new techniques. Awesome card. TFS.
ReplyDeleteMstgane
Ann Robbins
how gorgeous! Wow! Thanks so much for sharing this technique.
ReplyDeleteWhat fun! Inky fingers make me a happy girl, too! Love the layering on this...the outcome is sophisticated...very nice! Thanks, Kathy Jo.
ReplyDeleteThis comment has been removed by the author.
ReplyDeleteSuper fun techniques, Kathy Jo! Can't wait to try them.
ReplyDeleteyozgat
ReplyDeletesivas
bayburt
van
uşak
L2Q
0C01F
ReplyDeleteOsmaniye Evden Eve Nakliyat
Erzincan Lojistik
Amasya Parça Eşya Taşıma
Iğdır Lojistik
Malatya Evden Eve Nakliyat
34252
ReplyDeleteBitcoin Çıkarma
Twitter Retweet Satın Al
Binance Nasıl Üye Olunur
Twitter Beğeni Satın Al
Flare Coin Hangi Borsada
Tiktok İzlenme Satın Al
Coin Madenciliği Nasıl Yapılır
Linkedin Takipçi Satın Al
Arg Coin Hangi Borsada
C3FEA
ReplyDeletesatoshi
zkswap
ledger desktop
poocoin
solflare
arbitrum
shiba
defillama
ledger live
7055F
ReplyDeletepoocoin
avax
arbitrum
dappradar
dcent
eigenlayer
poocoin
dexscreener
galagames
D31A5BFB07
ReplyDeleteinstagram takipçi bot
tiktok beğeni satın al
ig takipçi
telafili takipçi
takipçi paketi