
Hello Crafty Friends!
Were you able to see all of the lovely projects using the new Postage Edge Shapes Collection? The Intro Hop was on Monday and the Creative Team shared projects on Facebook, Instagram, and blogs. You can see all of the projects on Facebook at the Amazing Paper Grace- Creative Encouragement Community. Feel free to join the community to see and share your own projects using Amazing Paper Grace product. Would love to see what you create!!
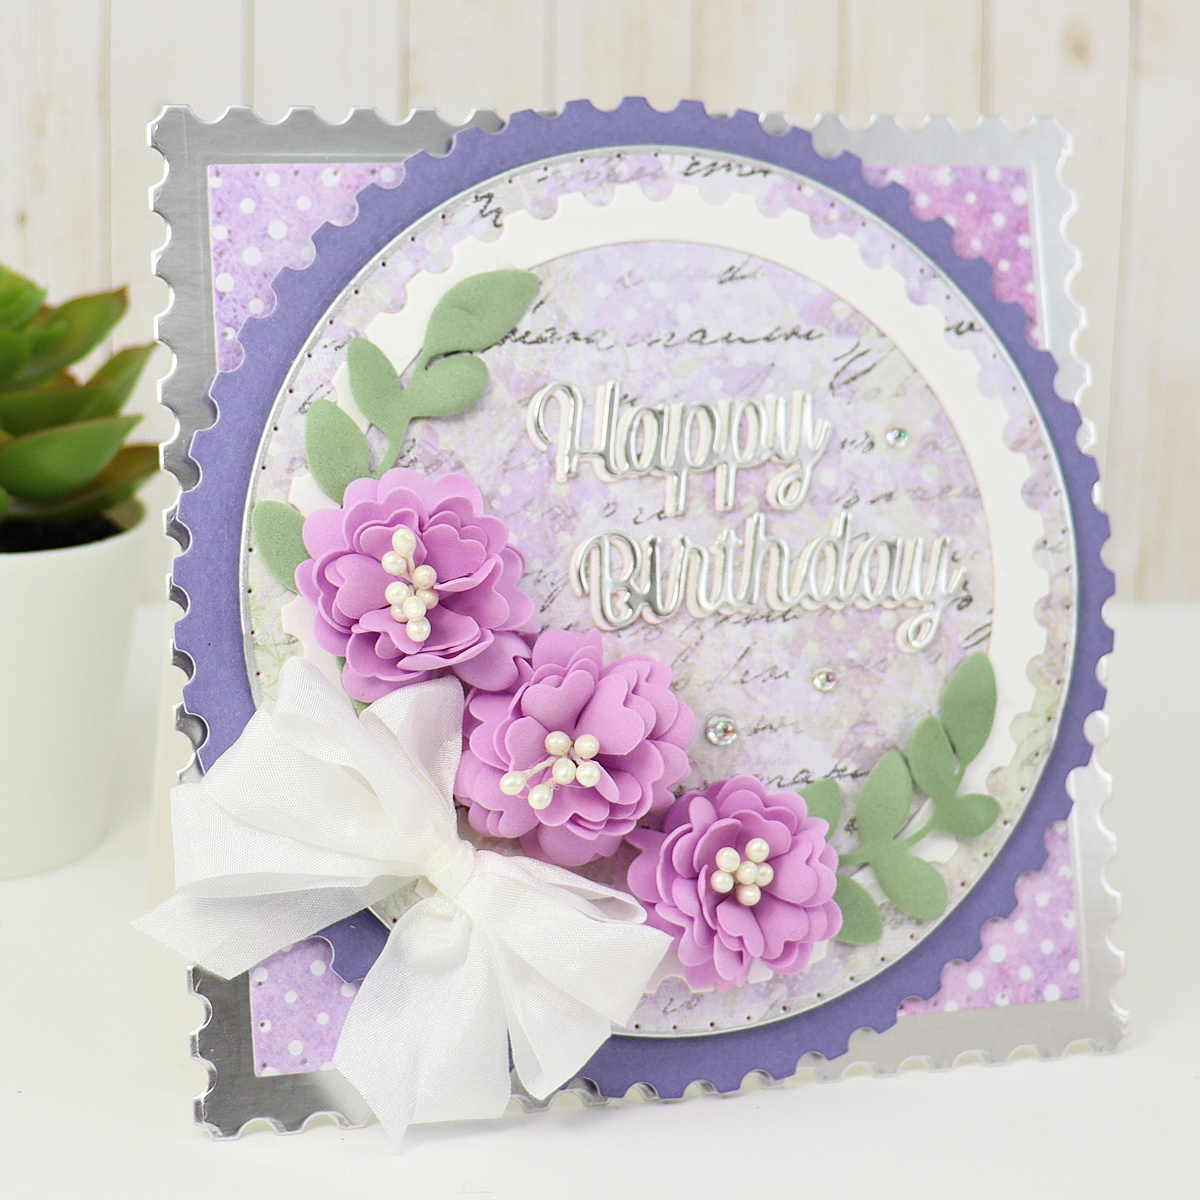
Today I would like to share a birthday card I created for a wonderful friend. She is one of those special people that makes the world a better place just by being her. I feel so fortunate to say she is my friend! For her birthday I created a card using purple as that is her favorite color.

Her card was created using the newly released Postage Edge Shapes dies in square (S5-538):


- Die cut silver card stock using the largest postage square die. If your silver is not heavy weight, die cut again in white. Mount the silver onto the white and set aside.
- Die cut patterned paper using the largest non-postage square die. Mount to the silver postage using double sided tape.
- Die cut purple cardstock using the circle postage die. Mount to card front using foam tape. Die cut a different piece of patterned paper using the circle die. Optional: apply silver marker along the edge. Mount to base using foam tape.
- Die cut white card stock using the next size down postage and circle die to create a frame. Mount to card front using liquid adhesive.

- Die cut Happy Birthday (S4-1206) twice from silver and white card stock. Offset mount the silver to the white using liquid adhesive. Mount to card front using liquid adhesive.
- Die cut purple foam using flower dies. I used set S4-867 but Amazing Paper Grace has many lovely flower dies to choose from. Cut several layers for each flower bundle. Use a heat tool, hot foil platform or clothes iron to heat up and curl the flower petals. Stack foam die cuts to create flowers. Insert stamen and use hot glue to secure. After cool, use cutter to rim underside of stamen and glue. Die cut foliage from green foam and heat slightly. Mount all to card front using hot glue.

- Create triple bow and mount using hot glue.
- Add half pearls or drops as desired.
- You can next either mount onto a white card blank or create an easel stand back. The easel stand back will allow it to be a shaped card.


I do hope you enjoyed the projects! Thank you for stopping by! Have a happy, crafty day.
Hugs,
Kathy Jo
Thanks for creating this blog and helping others to learn
ReplyDeleteLovely blog thanks for taking the time to share this
ReplyDelete