Pages

Showing posts with label Upcycle. Show all posts

Thursday, September 5, 2024

Learn how to use an old hardcover book for your junk journal!


Hello Crafty Friends!

Are you interested in junk journals?  Perhaps you have made many or you would like to start and do not know where to begin?  Junk journals are fun to make and are a great way to create something unique.  I so enjoy sitting in my craft room and taking papers or other items that would possibly end up in recycling or (gasp!) a landfill then making something new with them.  It is very relaxing and sparks the inner child in me.
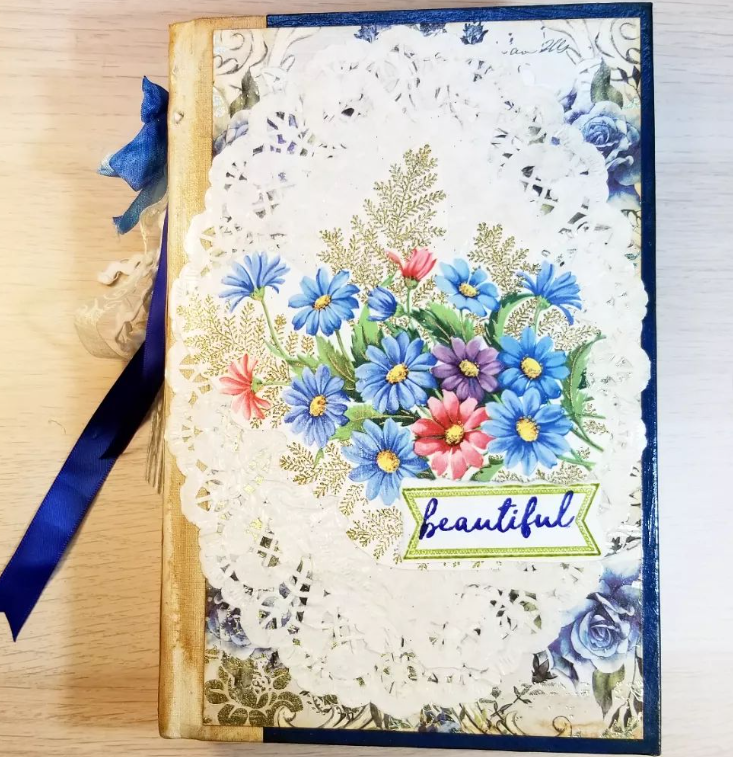

Sometimes the most difficult part of starting something new is the first step.  Several people have approached me and said "I would like to make a junk journal but have no idea where to begin" or, even worse say, "I would make a junk journal but it would probably turn out horrible".  Nope, I do not believe the second one.  The first statement is easy- I say let's go on this crafty journey together!


A few weeks ago I shared my first junk journal.  It still makes my heart happy.  A lot of love went into that journal and I am proud of myself for taking that first step and trying something new.  
Now I am doing a weekly YouTube Live at 10am AST/ 8am CST to walk through the steps to create your own junk journal.  


Last week I shared how you can take an old hard cover book and prep it for your junk journal.  I share tips that I have learned to help you turn your first (or second or third...) book spine into a great starting point!

You can join in on the Live every Sunday on my YouTube channel: @kathyjocrafts

Feel free to leave questions or comments on the YouTube channel.  Follow me on YouTube and join in on the creativity!

Have a happy, crafty day.

Hugs,

Kathy Jo


Friday, July 19, 2019

Upcycled Retro "You are inspiring" sewing pattern card

Hello Crafty Friends!

It is my day to share on Quietfire Creations.  For my project, I created a card using a vintage sewing pattern and the You are stamp set:
You Are, Set of 5 - Mounted

For card instructions and details, feel free to hop on over to the post!

Have a happy, crafty day!
Big Hugs,
Kathy Jo


Thursday, April 19, 2018

"Life doesn't have to be perfect..." upcycled Quetfire Design frame

Hello Crafty Friends!

It is my turn to post at Quietfire Creations and I am sharing an upcycled frame using one of the newly released stamps from Quietfire Design, Life doesn't have to be perfect:
Life Doesn't Have to be Perfect - Mounted
You should have seen this poor, sad frame before I upcycled it.  It was dark, dreary and tired.  Some Gesso, white paint and gold paste later and a refreshed frame was complete.  I love how the beautiful sentiment pops against the soft colors of the frame and papers.
For more project details, feel free to hop on over to Quietfire Creations.

Product used:
Quietfire Design: Life Doesn't have to be perfect stamp
Spellbinders: Coralene's ChemiseIsabella Frame
Prima Marketing: Love Story paper pad
Ranger Ink: Victorian Velvet Distress InkJet Black Archival Ink
Nuvo: Gloss Drops in Simply White

Thank you for stopping by!
Have a happy, crafty day.
Big Hugs,
Kathy Jo


Monday, April 2, 2018

Frame It- Butterfly Irish Blessing


Hello Crafty Friends!

It is my day to post at Quietfire Creations and I am sharing an upcycled frame using Quietfire Design's "May the Wings"stamp.  The stamp is from the Butterfly Circles stamp collection:
Butterfly Circles, May the Wings, set of 5 stamps - Mounted
The frame was picked up at a local second hand store- it was a perfect match for the lovely stamp!
The beautiful papers are from Graphic 45's Nature Sketchbook collection.

For more details and project instructions, feel free to hop on over to the post at Quietfire Creations.

Thanks for stopping by!
Have a happy, crafty day.
Hugs,
Kathy Jo

Monday, March 26, 2018

Best Blogger Contest- Upcycled bottle using Plaid products

Hello Crafty Friends!

In January I was fortunate to attend Creativation in Phoenix.  Over that weekend I attended the FaveCrafts Prime Networking Event.  During that event I met with several sponsors to discuss their products and many sponsors provided product to be used on projects.  These projects would be shared on our blogs, social media and be entered into FaveCrafts' Best Blogger Contest.  Today I am sharing the first project for the contest: an upcycled bottle using Plaid Enterprise, Inc products.

The project started with a bottle that should have been placed in recycling but I liked the shape of the bottle too much to toss it.  Instead I grabbed some mixed media product to upcycle the beautiful bottle. 

The bottle required prepping: after a thorough cleaning I applied glue and seal to the entire surface.  After drying, white gesso was applied.  The next steps are where the fun began...

FolkArt Crackle Medium was applied to the gesso surface.  A crackled surface appeared after drying.  Next a layer of FolkArt Metallics in Ice Blue was applied liberally to the bottle.  The crackled metallic sheen is gorgeous:
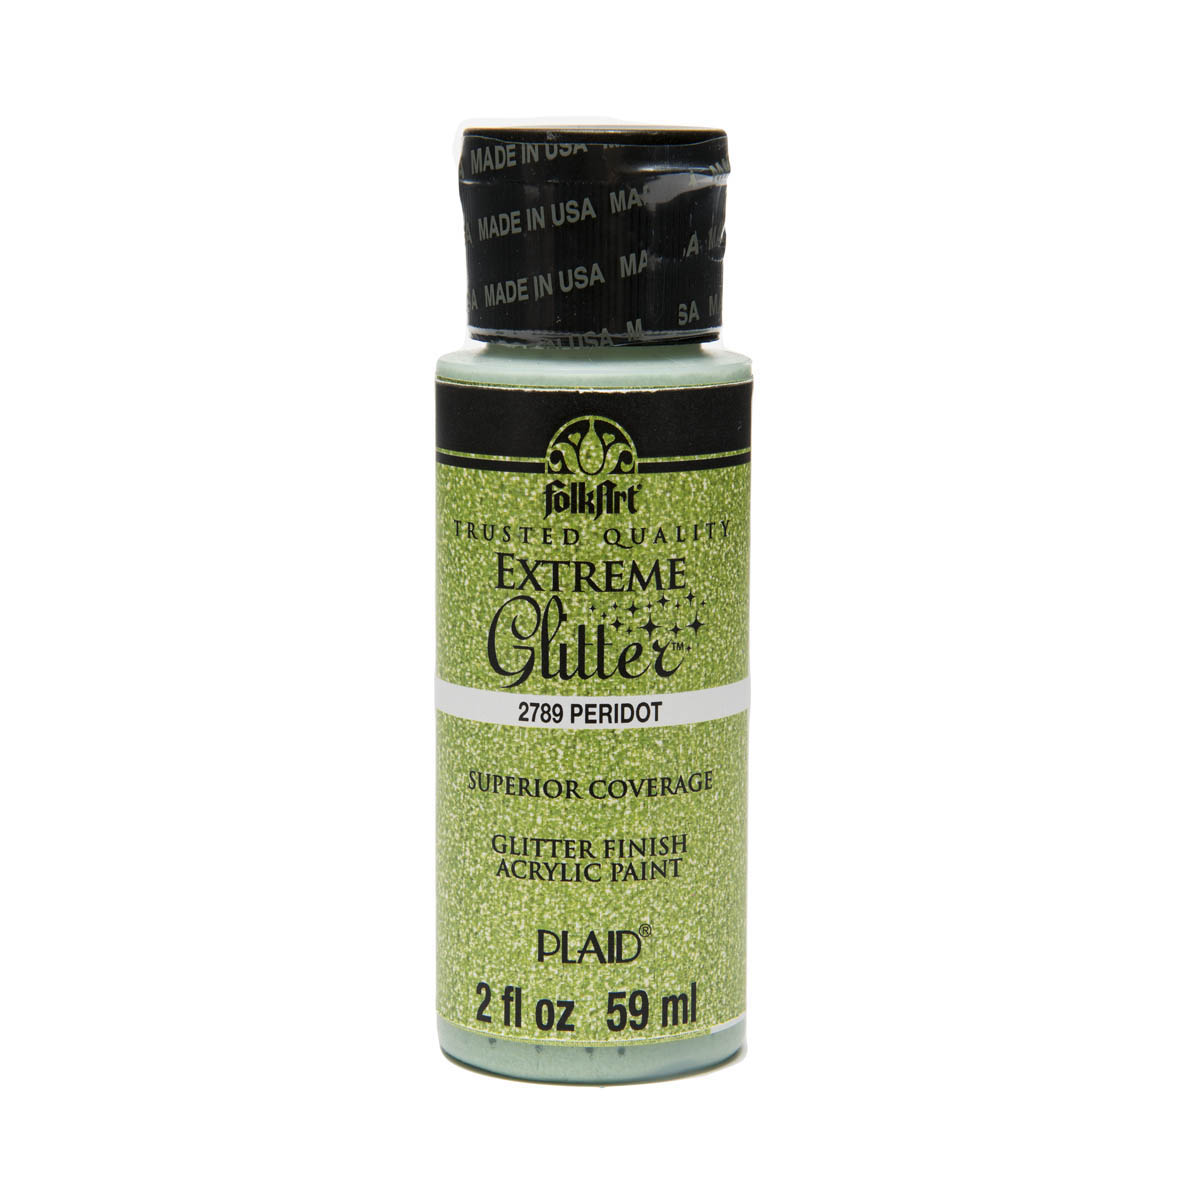
Next, FolkArt Glitter paint in Peridot was applied to the top of the bottle.  I wanted a dripping affect so I purposely used a lot of the paint and let it slowly drip down the bottle.
After it was completely dry, I applied a light layer of the Metallic again over the entire bottle.  It resulted in a very shimmery, metallic finish.  Below is a closeup of the finish.  You can see the Peridot glitter in the crackled surface, too.
The final touch was the application of gilded flakes to the top of the bottle. 

The colors were not only picked because I like them- I wanted a bottle to hold the colorful group of feathers that have been patiently waiting for the perfect container.  The bottle and feathers look fantastic together!
It is so bright, shimmery and pretty!  It will look great on a shelf in front of a window.

Thank you for stopping by!  And a big Thank You to Plaid Enterprises, Inc for being a sponsor at the Prime Networking Event!

Plaid

Have a happy, crafty day.
Big Hugs,
Kathy Jo

Plaid product used:

FolkArt ® Metallics - Ice Blue, 2 oz.
Metallics- Ice Blue

FolkArt ® Mediums - Crackle Medium, 2 oz.
Crackle Medium
FolkArt ® Extreme Glitter™ - Peridot, 2 oz.
Extreme Glitter


Friday, May 19, 2017

"Live Laugh Love" upcycled wall art

Hello Crafty Friends!

It is my time to share a project at Quietfire Creations.  The project is upcycled wall art.  I took a tired, out of date item, repainted it, and used Quietfire Designs' dies, Live, Laugh and Love to create a fresh and happy piece of wall art.
The dies were used to cut both ivory and pink card stock.
The flowers are from my crafty stash.  Frosted Lace Stickles was used on the flower centers.
The project came together in a flash and it felt good to reuse an item that may have never been used again.

Thanks for stopping by!  I hope you enjoyed the upcycle project.  :)
Have a happy, crafty day!
Hugs,
Kathy Jo

This project is entered into the following challenge:
Simon Says Stamp, A bit of Sparkle

Thursday, April 6, 2017

"Believe" Graphic 45 Nature Sketchbook and Quietfire Design frame


Hello Crafty Friends!


Spring has sprung and, as a gardener, my mind is full of ideas for the gardens.  Last week my friends and I started various sunflower seeds.  The visions of tall, happy sunflowers in our late summer gardens have been the subject of our excited talks this week.  I guess you could say that gardeners always believe- that with our pleasurable work- something wonderful is about to happen.   


With gardens on my mind, I upcycled a frame using Quietfire Designs' "Always Believe" stamp and "Believe" die.  

 Jet Black Archival Ink was used on Graphic 45's Nature Sketchbook ivory paper.  (Nature Sketchbook was used entirely as the papers for this project.)  Sweet butterflies and lush foliage create a natural frame around the beautiful stamp.
Believe was die cut and mounted on two layers of papers.  Lady bugs and a dragonfly grace the lovely die cut.
Glossy Accents was applied to all eggs, lady bugs and other wee insects.
 Layers of plants and insects fill the frame.
 On top of layers were bright butterflies.
 Inka Gold was applied along all frame edges and on the layers below the Believe die cut.
 Full of life frame!  I hope my gardens are as spirited as the frame.  :)


After hours of fussy cutting, mounting with foam tape and adding Stickles or clear enamel, my dreamlike garden wall art was complete.  Seeing the frame on my wall makes me smile with thoughts- and belief- that the gardens will lush and beautiful with life.

Thank you very much for stopping by!  I do hope you enjoyed the project.  Maybe it has inspired you to make a project for a gardener friend or yourself.  Feel free to share a link in the comments here or on social media as I would love to see it!  :)

Have a happy, crafty day.
Big Hugs,
Kathy Jo

Sunday, February 21, 2016

Small Die Storage- Graphic 45 Upcycle project

Hello Crafty Friends!

Last night was our monthly Crafty Gals meeting and as always it was a fabulous time.  Until about two hours before the meeting, I was standing in our kitchen thinking about the meeting and that I had no clue what to work on.  Then, I started to think about my die organization in my craft room and how I have no efficient storage for my small dies.  It was then that I looked at the empty 48 count Fiber One box in my kitchen and the project idea was born.
Before heading to the meeting, I removed the cover of the box, adhered a piece of chipboard on either end (the ends have box folds to "smooth" out) and applied black Gesso inside and out.  At the meeting I brought many sheets of Graphic 45's Artisan Style papers, doilies, gold marker, pearls, and black flower ribbon.  The box was almost completely finished by the end of the meeting- this morning the green twine and buttons were added.  Admittedly, I would have loved to add more details and layering but lack of available surface space in my craft room means that the box had to take up the least amount of space as possible.

Here is the front iso view of the box:
Left side (love the peacock!!):

Rear iso view:

Right side (such a sweet looking home):
The box with a few of my dies inside.  Perfect fit!  And there is enough space for more dies...oh-oh...I think I just heard my wallet cry...
Thanks for stopping by!  I do hope you enjoyed the upcycled box.  And don't forget about the Tim Holtz Stencil Giveaway!

Have a happy, crafty day!
Big Hugs,
Kathy Jo

This project is entered into the following challenges:
613 Avenue Create, AG
Word Art Wednesday, AG
Simon Says Stamp Monday, Upcycle

Monday, December 7, 2015

Tim Holtz "JOYFUL" Upcycled Holiday Wall Hanger

Hello Crafty Friends!

Although I have spoken off and on about this for a couple of years now, it looks like I will be moving my crafty space to a larger area of our home.  It will be a lot of work but will be well worth it!  My current craft area has a usable work space that is smaller than a 12" x 12" scrap page- which makes working on some projects very difficult.  The new craft area is a guest room/storage room and requires items in the room to be removed.  One of those items is a wall hanger that hung behind the entry door.  It was about to be wrapped and added to the Salvation Army donation bin when I realized that it would be a great upcycle project.  It took many fun steps to create this project and it felt good to breath life into the old hanger.

First I applied white Distress Crackle to the frame and when dried I lightly applied Brushed Corduroy Distress Ink to accentuate the crackle.
White card stock had Distress Paint in Twisted Citron, Peeled Paint and Crushed Olive applied.  After drying, Tarnished Brass Paint was applied, spritzed with water, dried slightly and a paper towel used to remove the wet ink.  It gave the tree an aged metallic appearance.  It was die cut with Sizzix' Christmas Tree #2, Ranger Texture paste applied and sprinkled with Tim Holtz' Clear Rock Candy glitter. Tim Holtz' Alterations star was adhered on top.
TH stencil (Speckles) and more embossing paste was used on a piece festive paper from TH' Yuletide paper pad.  Rock Candy glitter was applied.
A piece of corrugate was torn, embossing paste and glitter applied. 
Chevron paper from the yuletide pad was cut and used as a border around the image.
"JOYFUL" from TH flash cards was mounted on a frame from Yuletide paper.  Silver glitter paper was die cut using Sizzix' snowflake background die.  Red dots were created using Stickles in Candy Cane.

 A big double bow was added to the bottom and the wall hanger was complete!
The wall hanger will be hung in the entryway this holiday season and I will smile thinking about how I found a new use for the old wall hanger.  :)  

Thanks for stopping by!  I do hope you enjoyed the upcycled project.  
Have a happy crafty day!
Big Hugs,
Kathy Jo

Friday, November 13, 2015

Guest Designer- Elizabeth Craft Designs

Hello Crafty Friends!

Great news: I am a Guest Designer today at the Elizabeth Craft Designs blog!

For my project I upcycled a frame a created a festive, crackled Believe decoration.  Feel free to hop on over to the Elizabeth Craft Designs blog for more project details.  :)

Big Crafty Hugs,
Kathy Jo
Related Posts Plugin for WordPress, Blogger...