Pages

Showing posts with label winter wonderland. Show all posts

Friday, October 26, 2018

Sparkling metallic tree Christmas card


Happy Friday, Crafty Friends!

Last weekend I spent some time in the craft room to create more cards for Christmas.  Today's card used several new products from Crafter's Companion that are great to use for your holiday cards.

The focus of the card front is the metallic Christmas Tree.  It was created using the Sparkling Tree from the Create-A-Card line.  The Create-A-Card die set line is quite interesting and versatile.  The Sparkling Tree is a three piece die set with the outside cut as two dies and the internal design as one die.  The outside dies can be used together to create a single die cut tree or one of the dies can be used on the edge of card stock (as done on my card) to create a neat shaped edge.  The blue metallic tree was created using all three dies.
The end result is beautiful and adds an extra interesting feature to your card front.  I made sure to line up the paper on the inside of the card in such a way that the tree on the card front covers the tree on the inside.  A pretty little detail!

Crafter's Companion product used:
Create-A-Card, Sparkling Tree
Winter Wonderland 6x6 paper pad
Luxury card stock
Luxury mirror card stock
Festive Phrases clear stamps

Have a wonderful weekend!  Thank you for stopping by!
Have a happy, crafty day.
Big Hugs,
Kathy Jo


Friday, September 28, 2018

Exciting news! Projects on The Shopping Channel October 2!

Hello Crafty Friends!

I am out of the world happy to say that Crafter's Companion will be showcased on The Shopping Channel October 2...and I created 23 samples for the show!!!  That's right, this crafty gal will have projects on TV!  Can you believe it?  It still seems like a dream!

Here is one of the samples I created for the show.  It used several of the product from the Winter Wonderland Collection: Winter Wonderland papers, Dendritic Crystals background die, Matt Mirror card stock and the Festive Wishes die/stamp set.  Let's dive into the instructions!

Card instructions:

  1. Create top fold card using white card stock.
  2. Cut Luxury Mirror card stock to size and mount to card front using double sided adhesive tape.
  3. Mat and mount ornaments patterned paper (from 12 x 12 Winter Wonderland paper pad).
  4. Die cut Dentritic Crystals background die using Matt Mirror card stock.  Mount onto white card stock using liquid adhesive. Mount to card front.
  5. Fussy cut poinsettias and layer onto card front.  Apply Nuvo drops to flower center.
  6. Die cut matt and mirror card stock using Festive Wishes dies.  Mount to card front using double sided foam adhesive.
  7. Create bow and mount using liquid adhesive.  Fussy cut poinsettia and add to bow center.
  8. Decorate inside of card as desired.
Hope you enjoyed the project!  And I hope you will be able to check out the show on October 2!

Big Crafty Hugs!
Kathy Jo

Tuesday, November 28, 2017

Winter Wonderland festive Christmas card

Happy Tuesday!

Yesterday I shared a flip card using Graphic 45's Winter Wonderland papers.  I couldn't put the papers away without creating another card with them.  The beautiful images are perfect for card fronts.  The layout of this card could be used to recreate several cards using different images from the Winter Wonderland collection.

Easy Instructions (Note optional steps: I applied Distress Ink in Vintage Photo along the outside of all of the patterned papers and applied gold ink along edges.)

  • Create a 5x5 tent fold card base using ivory card stock.
  • Cut green background paper smaller than card front.
  • Cut two rectangles using coordinating patterned papers.  Cut two ivory rectangles slightly larger than patterned rectangles.  Mat rectangles.  Mount vertical rectangle set to card front.  Do not mount horizontal rectangle set yet.
  • Create double bow using dyed seam binding or your choice of coordinating ribbon.  Wrap second matted rectangles (from above step) using ribbon.  Mount to card front as shown.
  • Cut image and ivory paper size.  Mount to card front using double sided foam tape.
  • Mount double bow to card front using liquid adhesive.  Mount button to bow center.


Isn't the image lovely?  There are several lovely images in the Winter Wonderland set that can be used as the focal point on card fronts.

Thanks for stopping by!
Big Hugs,
Kathy Jo

Product used:

Monday, November 27, 2017

"Joy" Flip card using Graphic 45 Winter Wonderland

Hello Crafty Friends!

As I am writing this blog post, one of my sweet kitties (Pepper) is curled up between my keyboard and my arms.  She is purring away and giving head butts every moment she can.  There are many sources of joy in my life- moments like this are included on my joy list.  It is fitting that she here while I write this post to share the latest Christmas card, "Joy".

The fancy fold card base was created using a flip fold die from Sizzix.  Red card stock was used as the base.  Graphic 45's Winter Wonderland supplied the coordinating patterned papers and fussy cut flowers/stamps.  The Joy die was used to cut gold metallic construction paper.
A Sakura Calligraphy Marker was used to apply the gold on all of the edges.  More gold construction paper was used to die cut the vertical edge (die from the same set) and Nuvo Drops were applied as shown
On the back of the flip, I left the area blank to write a sentiment and sign.
It is difficult to see in the photos, but Stickles was also used in the flower centers and on the stamps.  The card is definitely joyous and glittery.  :)
The card looks complicated to make but the dies and patterned paper did most of the work.  It is a neat style of card because it has dimension but flattens well and is easy to mail.

Hope your day is full of crafty fun and joy!
Thanks for stopping by.
Hugs,
Kathy Jo

Product used:
Joy Love Peace die set
 
Graphic 45 Winter Wonderland
Nuvo Drops
I could not find the exact flip it die set online (see photo of the set I used) but here is a link to similar Sizzix dies.
Sizzix Elegant Flip-its Card Set

Sunday, November 19, 2017

Graphic 45 Winter Wonderland card

Hellloooo Crafty Friends!

How are your Christmas cards coming along?  Have you purchased any new Christmas papers or paper crafting goodies?  The craft stores are full of new Christmas goodies for us crafty types.  For me, it is the most wonderful time of the year in a craft store.  :)

As you all may know, I adore Graphic 45 products and the Winter Wonderland collection is no exception.  Several cards have been created using this collection and today I would like to share one of my favorites.  The card has several layers but it was quite easy to make.  The heartwarming scene is the focal point of the card front...so sweet!

Instructions:

  • Make a tent fold 5x5 card using Kraft card stock.
  • Cut a holly berry background smaller than the card base, outline in gold (optional) and mount.
  • Mount doily (I used a Recollections canvas doily) to card center.
  • Create pennant from red dotted paper, outline in gold (optional) and mount.
  • Use foam tape to secure ephemera card (or image from ephemera page in 12x12 collection).
  • Outline Winter Wonderland tag in gold (optional) and mount using foam tape to bottom half and then regular tape or glue to top half.
  • Apply Stickles to leaves and poinsettia.
  • Die seam binding using Distress Ink or Distress Stain in Barn Door.  After drying, create bow and mount to front.
  • Add wee brown twine bow.

That's it!  The instructions can easily be duplicated for several more cards from the same collection.

Product used:
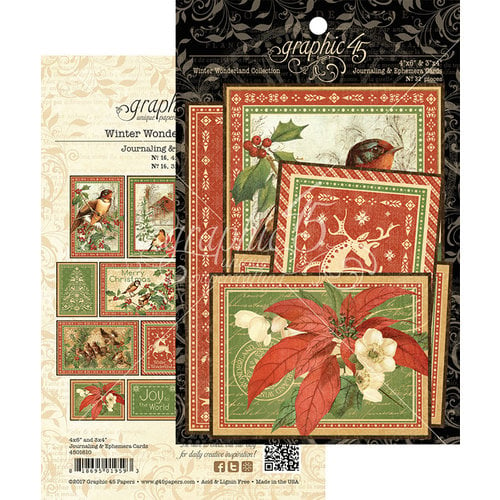
Graphic 45 - Winter Wonderland Collection - Christmas - Ephemera and Journaling Cards

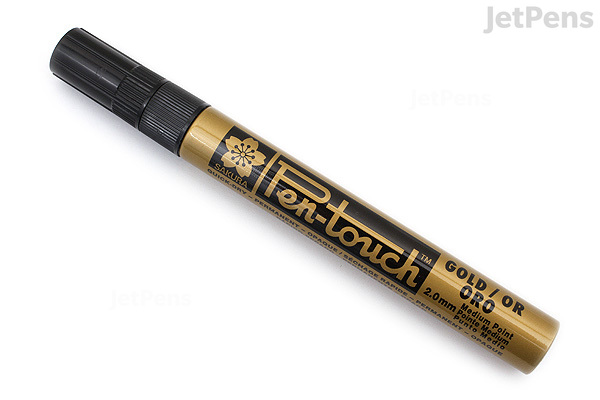
Also used was the Pen-Touch along the paper edges.  Right now it is not in stock at Blitsy but I have a link inserted for when it is re-stocked.
Image result for pen touch gold scrapbook.com

Have a happy, crafty day!
Big Hugs,
Kathy Jo

Saturday, November 22, 2014

Winter Wonderland card using Graphic 45's Twas the Night Before Christmas paper

 Yay!  It is Saturday!  FINALLY.

This week I was fortunate to find time to craft.  The Christmas card stash increased and I am feeling confident that this year there will not be any last minute cards to make!  Woo-who!  I owe it to my New Year's Resolution (make one Christmas card a month) and all of the gorgeous holiday stamps from Quietfire (they so inspire me to use them...Suzanne Cannon...you rock).

The card I am sharing now was based off a sketch by a sweet blogging friend, Jessi.  She is a designer at Tuesday morning sketches and came up with this great sketch this week.  The sketch made it easy as the card took less than 1.5 hours to make.  That is honestly not bad for me as I do nothing quickly in my crafty room.
Right away I thought of the new Graphic 45 paper, Twas the Night Before Christmas, and Quietfire's new stamp set, Winter Wonderland:
Winter Wonderland Set of 6 Stamps - Mounted

Ok. Ok.  I know what you are thinking.  Shouldn't it be snowflake paper?  Nope.  I wanted to use the holly paper.  Call me a rebel. 

Here is a side view of the card.  Stickles was used (big surprise) on the fussy cut holly and all of the holly on the background paper.
Flat view of the card.  Guess what?  I can actually mail this one.  
Edges were distressed with Antique Linen.  Green button was from my stash and gold metallic twine was used on the button.
Hope you enjoyed the card and I hope your Christmas stash is doing well!

Thanks for the awesome sketch, Jessi!  

Have a good weekend and thanks for stopping by!
Hugs,
Kathy Jo

This card is entered into the following challenges:
Tuesday Morning Sketches, Sketch
Word Art Wednesday, AG
Related Posts Plugin for WordPress, Blogger...