Pages

Wednesday, December 30, 2015

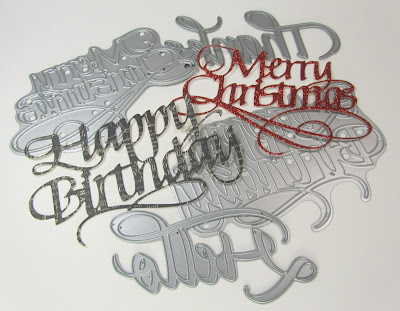
CHA Sneak Peek- new ECD birthday die

Hello Crafty Friends!

I am very excited to share another sneak peek of the soon to be released Elizabeth Craft Designs die designed by the ever-so-talented Suzanne Cannon.
http://www.elizabethcraftdesigns.com/products/a-way-with-words-happy-birthday-2-1161
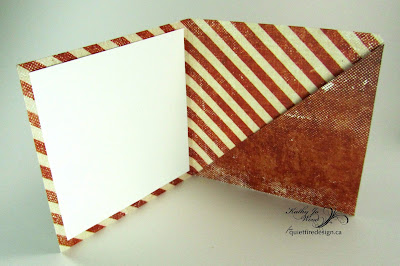
The details of the birthday card holder are at Quietfire Design- feel free to hop on over. 
Thanks for stopping by!
Have a happy crafty day!
Big Hugs,
Kathy Jo

Thursday, December 17, 2015

CHA 2016 Sneak Peek- new Suzanne Cannon/Elizabeth Craft Design die "Dream"

Hello Crafty Friends!  Today is my day to post at Quietfire Design and I am so excited to share a project using Suzanne Cannon's die designed for Elizabeth Craft Designs: Dream. This is one of many new releases for CHA 2016!  Hop on over to the Quietfire Design Blog for more details on the card and for a link to the video showing off the new dies.
Thanks so much for stopping by!
Have a happy, crafty day.
Kathy Jo

Sunday, December 13, 2015

Graphic 45 Christmas card

Hello Crafty Friends!

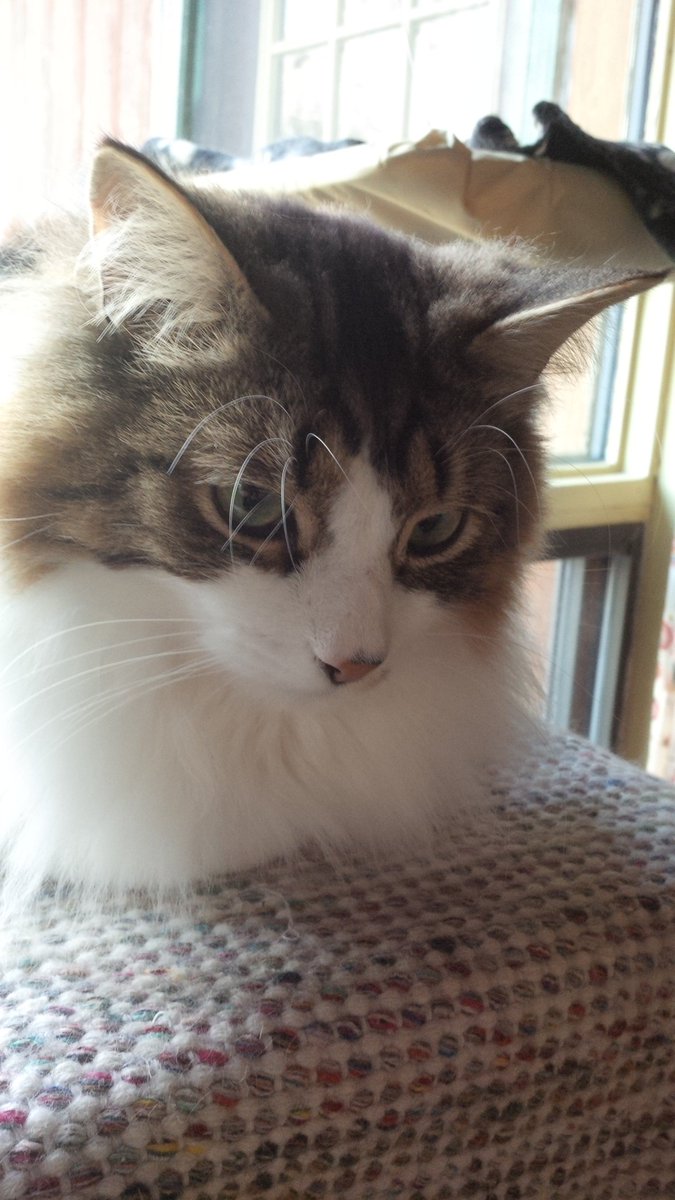
How is your weekend thus far?  I hope it has been good one.  The weekend here has been great.  Actually, I have been looking forward to this weekend for a few weeks now.  This is one of my favorite weekends of the year because yesterday my hubby and I picked out our Christmas tree and today is the annual Open House at BideAwhile- a local shelter for homeless animals.  It is an amazing shelter with the best employees and volunteers.  It truly is a special place. What makes this year even better is the memory of last year's open house.  Our family had lost our sweet kitty Sam earlier in 2014- it broke my heart as he was with me for over 17 years.  When he was gone, I told my husband I didn't want a new cat in the home for a long time.  It just hurt too much.  So, we went to the open house last year with no intentions of finding another family member...but one found us and his name was Nico.  He melted our hearts at first glance: he looked into our eyes and reached his paw out through his kennel trying to touch us.  It was if he was saying "I would like to be in your family" and we wanted him to be in our family, too.  He was a perfect fit and I cannot say how wonderful our home is with him in it.  Here is a picture of Nico the first day he was in our home.
Embedded image permalink
Isn't he a cutie?

I could talk about my furry family for a long time but that is not why you stopped by...hmm...how about we talk about crafting?  :)  Another Christmas card is completed and this one is Graphic 45 based.  It used papers from the Time to Flourish and Twas the Night Before Christmas collections.  The poinsettia and bird were fussy cut from the Time to Flourish papers and adhered using foam tape.  Of course Stickles was applied at will!
The crinkle ribbon was tied with ivory twine.  The beautiful Spellbinders die, Labels 40 Decorative Accents, was used with green card stock and pearls applied.
Distress inks were applied along all edges for a vintage touch.
Don't you just love Graphic 45 papers?  Beautiful papers!

Thanks for stopping by and reading my blog post.  :)
Have a happy, crafty weekend!
Big Hugs,
Kathy Jo

Saturday, December 12, 2015

Merry Christmas

Hello Crafty Friends!

Sharing a "quick-to-make" Christmas card today and it is the last of the Penny Black Christmas sticker cards.  The sticker set has proven to be a great purchase!  The images are so pretty- especially loving the bird stickers.

In addition to the image on the card front is Quietfire Design's beautiful "Merry Christmas" from the Merry Christmas Plain and Simple set:
Merry Christmas Plain & Simple, Set of 6 - Mounted
The sentiment was heat embossed onto Kraft card stock using red glitter embossing powder.
Red twine was tied along the spine... 
Stickles in Candy Cane was applied to the berries and Peacock applied to the bird.
Distress inks (Vintage Photo, Tea Dye and Walnut Stain) was applied to all edges.
The card was completed in a flash!  And the heat embossed stamped Merry Christmas matched the berries so well.  Another Christmas card complete.  (Yay!)

Thanks so much for stopping by!  Have a happy crafty day.
Big Hugs,
Kathy Jo

Friday, December 11, 2015

Winter Birds card and fabric background tutorial

Hello Crafty Friends!

One of my favorite things to do in my craft room is taking supplies and trying to find new ways to use them.  Sometimes I am happy with the results and sometimes I chalk up the time spent to "just having fun". The card today was happy results: I created a fabric patterned background to match a sweet winter birds image.

First I applied Distress Inks in Tumbled Glass, Bundled Sage and Antique Linen to DCWV's adhesive fabric.  The fabric was kept on the adhesive sheet.
After drying, the fabric was dry embossed using Elizabeth Craft Designs' Berry Branch folder.  A brayer was run over Distress Ink in Vintage Photo and then run over the embossed image.  (Please note that next time I will try Archival Ink on the background because the Vintage Photo did "spread" and the branches did not stay as crisp images.  However, it worked with this card because the image background had smudges of Vintage Photo along the edges.)
Enamel Accents was randomly applied to look like gently falling snow.
After drying, the fabric was cut to size and mounted onto white card stock.  This "flattened" my embossed image but the pretty pattern remained.  The bird image was cut to size, mounted on red card stock and then mounted to the fabric background.  Stickles in Candy Cane was applied to the background and image berries.
A single green crinkle ribbon bow was added and the card was complete.

While creating the background, I was unsure how well it would match the image.  In the end, I was very happy with the results as the background did match well.  And the card front is super cute!

Thanks for stopping by.   Hope you enjoyed the background tutorial and the card.  :)
Have a happy crafty day!
Big Hugs,
Kathy Jo

This card is entered into the following challenges:
Word Art Wednesday, AG
Craftin Desert Divas, Christmas

Thursday, December 10, 2015

Winter Birdie Holiday card using Cheery Lynn dies

Hello Crafters!

Can you believe that Christmas is just a couple of weeks away?  Time is flying by.  We are slowly finishing off our Christmas list and I am finishing up the Christmas cards.  'Tis the season to be busy!

For the first time I purchased the set of Christmas Song stickers from Penny Black.  This set had different winter scenes and I thought they would be neat to try on card fronts.  The card today used a sweet red bird on festive branch.

First I stamped blue card card stock with IO's Cover a Card Woodgrain and green card stock with a Hero Arts background stamp (S5501).  They were trimmed with gold and mounted on a Kraft card base.  Cheery Lynn's Sophia's Heart doily die cut ivory card stock.
The bird scene was mounted on card stock and fussy cut. Gold trim applied.  Stickles was applied to the snowflake, berries and leaves.  A wood button was placed on top of Cheery Lynn's Pine Branches.
The lovely red die cut is Cheery Lynn's Southern Charm Valance.
Pearls were placed on corners and the card was complete.  
I have made a few other cards using the sticker set which I will share later this week.  

Thanks for stopping by!  I do hope you enjoyed the card.  :)
Have a happy crafty day!
Big Hugs,
Kathy Jo

This card is entered into the following challenges:
ScrapyLand, AG
Cheery Lynn, Red and Green
613 Ave Create, AG
Word Art Wednesday, AG
Simon Says Stamp Monday, Stamp it


Monday, December 7, 2015

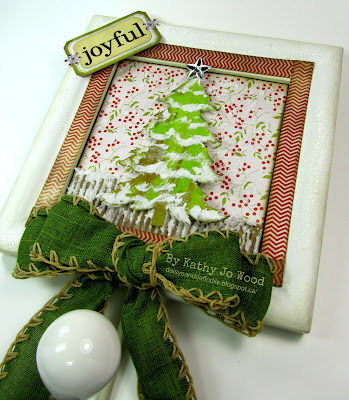
Tim Holtz "JOYFUL" Upcycled Holiday Wall Hanger

Hello Crafty Friends!

Although I have spoken off and on about this for a couple of years now, it looks like I will be moving my crafty space to a larger area of our home.  It will be a lot of work but will be well worth it!  My current craft area has a usable work space that is smaller than a 12" x 12" scrap page- which makes working on some projects very difficult.  The new craft area is a guest room/storage room and requires items in the room to be removed.  One of those items is a wall hanger that hung behind the entry door.  It was about to be wrapped and added to the Salvation Army donation bin when I realized that it would be a great upcycle project.  It took many fun steps to create this project and it felt good to breath life into the old hanger.

First I applied white Distress Crackle to the frame and when dried I lightly applied Brushed Corduroy Distress Ink to accentuate the crackle.
White card stock had Distress Paint in Twisted Citron, Peeled Paint and Crushed Olive applied.  After drying, Tarnished Brass Paint was applied, spritzed with water, dried slightly and a paper towel used to remove the wet ink.  It gave the tree an aged metallic appearance.  It was die cut with Sizzix' Christmas Tree #2, Ranger Texture paste applied and sprinkled with Tim Holtz' Clear Rock Candy glitter. Tim Holtz' Alterations star was adhered on top.
TH stencil (Speckles) and more embossing paste was used on a piece festive paper from TH' Yuletide paper pad.  Rock Candy glitter was applied.
A piece of corrugate was torn, embossing paste and glitter applied. 
Chevron paper from the yuletide pad was cut and used as a border around the image.
"JOYFUL" from TH flash cards was mounted on a frame from Yuletide paper.  Silver glitter paper was die cut using Sizzix' snowflake background die.  Red dots were created using Stickles in Candy Cane.

 A big double bow was added to the bottom and the wall hanger was complete!
The wall hanger will be hung in the entryway this holiday season and I will smile thinking about how I found a new use for the old wall hanger.  :)  

Thanks for stopping by!  I do hope you enjoyed the upcycled project.  
Have a happy crafty day!
Big Hugs,
Kathy Jo

Thursday, December 3, 2015

Gilded "We are like Snowflakes"

Hello Crafters!  

Today is my day to share a project at Quietfire Design and I am sharing a gilded Christmas card using Quietfire's "We are like Snowflakes" stamp:
We Are Like Snowflakes - Mounted
Here is a close up of the stamped sentiment.  Such a sweet saying and I love the wee hearts in the snowflake!

Thanks so much for stopping by! For more details and Quietfire crafty inspiration hop on over to the Quietfire Design blog.

Have a happy, crafty day!
Big Hugs,
Kathy Jo

Sunday, November 29, 2015

Merry Christmas! and blog hop reminder

 Hello Crafty Friends!

First, just a friendly reminder that today is the last day to leave a comment in the Way With Words blog hop.  Every blog participating in the hop has a die or stamp for a winning comment.  Start your blog hop here for more info
http://quietfirecreations.blogspot.ca/

December 1 is tomorrow and the Christmas cards will be frantically finished by some crafters- like me, as an example.  Today I am sharing a quick and elegant card using Elizabeth Craft Designs Merry Christmas die designed by Quietfire Design's Suzanne Cannon.

The die was used to cut red glitter paper and white card stock.  Musical paper from Tim Holtz' Yuletide paper pad was mounted on white card stock.  A piece of seam binding was wrapped as shown.  The Merry Christmas die cuts were offset and adhered on the paper. 
The layered assembly was mounted on a tent fold Kraft card base.  A double seam binding bow was the finishing touch. 
Yes, it was a quick and easy card but the results are elegant.  I really like how the red glitter die just "pops" off the card.  Such a pretty die!

I had better get back to card making.  The cards need to be ready for mailing soon!

Thanks for stopping by!  I hope you enjoyed the card and I wish you luck in the blog hop!
Big Crafty Hugs,
Kathy Jo

This card is entered into the following challenges:
Simon Says Stamp Wednesday, AG
Word Art Wednesday, AG

Tuesday, November 24, 2015

Sentiments of the Season Blog Hop- Tutorial and Giveaway

Welcome to the Quietfire Sentiments of the Season Blog Hop! We’re celebrating the season with projects using our favorite Quietfire sentiment stamps and dies. We have some great ideas to share with you!
We’re giving away a prize on each of the Sentiments of the Season blog posts. The posts will be on Designers’ personal blogs and one on Quietfire Creations. All you have to do is leave a comment on the Sentiments of the Season blog posts and you will be entered for a chance to win a Quietfire stamp or die from that blog. Each designer will randomly choose the winner from their comments.

Here is our schedule: 
Day 1- Monday November 23 : Teresa and Yogi
Day 2 -Tuesday November 24KathyJo and Judi Kauffman
Day 3 - Wednesday November 25Wanda and Yvonne
Day 4 - Thursday November 26Robyn and Selma
Day 5 - Friday November 27Diana and Suzanne

The deadline for leaving comments is Sunday November 29, 2015 at midnight PST. Winners will be posted shortly afterwards here on Quietfire Creations. Good luck and have fun!
http://www.quietfiredesign.ca/Quietfire-Dies-from-Elizabeth-Craft/
For the Blog Hop I thought I would share some new techniques for your dies. As many of you know, I am a huge die junkie. Dies are so fun to use and sometimes I spend hours just running dies through my machine to try out new materials or layouts.

Today I want to share die techniques that do not involve embossing or cutting, but how to use your dies as stamps. Quietfire dies are so beautiful…why limit them to only die cutting and embossing? This post is a long one so grab a cup of tea and enjoy!

Before we start:
* Make sure your die is clean and all paper tidbits are removed from the die.
* It is best to work with thinner, flexible papers- card board and heavy weight paper (such as 110lb) may be too heavy. Textured surfaces should be avoided. When in doubt, test it out.
* Place your material on a flexible stamping mat. Stamps are flexible to help with stamping- dies are stiff and need flex under the paper.
* Remember to clean your die after stamping. You don’t want to ruin future die cut items by covering them with ink.
* Although dies can be “stamped”, you will not have lovely fine details like you would from an actual stamp. Keep that in mind when designing your project.

Die stamp setup:
You do not want your die permanently attached to a stamping block so only use a small amount of removable tape on the back of your die. Here was my initial setup:
I placed my die on a block with removable tack tape. My whole block was covered with the tape so it was removable…but was very tricky to get off one time. I do not recommend using this setup if your block is super tacky.

Just to re-iterate: You want to avoid bending your die so limit the amount of removable tape used. A small amount of removable tape will make the removal process easier and will protect your die.

Die Stamping- Vellum:
Just like with a stamp, Archival Ink works well on vellum. Apply the Archival Ink onto the die stamp setup. Test the image on a scrap piece of paper. You may want to test a few times to figure out your pressure required. After stamping on the vellum you may notice some ink transferred in addition to your die lines. Use a Q-tip and some stamp cleaner solution on the vellum to remove the stray ink. Dry with a heat gun.
You could just leave the image as is but I chose to emboss on the back side of the vellum. It created a nice embossed image with a black outline.
Die stamping- Chalkboard:
The Quietfire dies work perfectly for your chalkboard paper project. After cleaning the die, heavily apply Versamark. Stamp the die on black paper and heat emboss using white embossing powder. The letters on my example were scribbled in with Sakura’s Souffle gel pens:
I really liked the way the chalkboard style turned out. The partially filled in letters look very cool against the black background. (Please note that if you are looking for stamps in the same style, check out Quietfire’s Fill 'er-up series.)
A peek at the inside- more of the patterned papers and "Merry Christmas" Quietfire stamped sentiment.
Die Stamping- Watercolor:
The chalkboard style was awesome but watercoloring turned out to be my favorite style for die stamping. After playing for some time with the watercolor technique, I decided to mix up my stamping. For the below card I created a watercolor background using Barn Door, applied a wee bit of water in the center (to lighten the watercolor) and then heat dried. Next I applied Archival Ink in Coffee onto the die, stamped and then heat dried. Merry Christmas was stamped over the Believe using Jet Black Archival Ink and heat dried. Note that I stamped the Believe and Merry Christmas over the lighter colored red area for emphasis. On a craft mat, mix Barn Door, Vintage Photo and water. Apply the watercolor mix inside the Believe letters.
The seam binding was dyed using the leftover ink from mixture above. My hands were an inky mess at this point but I did not care because I having a blast playing in the craft room!
I do hope you liked the die stamping exploration…I know I enjoyed playing with the dies! If you do make a project using the above techniques, please link back to this post. I will make sure to leave some love on your blog, too. Talking about leaving love, don’t forget to leave a comment for your chance to win a new stamp or die from Quietfire Design. Your next stop on this hop is the ever so talented Judi Kauffman.

Thanks for stopping by! Good luck!
Big Crafty Hugs,
Kathy Jo
The cards above are entered into the following challenges:
Simon Says Stamp Wednesday, Christmas
613 Avenue Create, AG
Word Art Wednesday, AG
Related Posts Plugin for WordPress, Blogger...